
This is your personal blueprint for a garage that finally looks like a brand-new space—without the chaos. Imagine bikes ready to roll, tools neat as a pin, and seasonal stuff tucked away yet easy to reach. Ready to dive in? Let’s pin this plan into real life.
Maximize Your Space With a Clear Zone Plan: Front-Load for Daily Items, Back-Load for Tools
Your garage space has two personalities: the everyday essentials you reach for daily, and the heavier, bulkier stuff that deserves a quiet corner. Start by carving the space into two zones:
- Front-of-garage zone for bikes, scooters, sports gear, and commonly used items—easy access is non-negotiable here.
- Back-of-garage and side walls for tools, woodworking gear, gardening tools, and bulky storage—this keeps curious little hands away from hazards.
This separation not only reduces chaos but also makes it easier to implement specific storage systems tailored to each category. Want a quick win? Visualize your workflow: from “grab-and-go” to “tools-only zone” and “seasonal stash” above your head. Pin this concept for your future remodel or garage refresh.
Back Wall Mastery: The Ultimate Tool and Woodworking Command Center
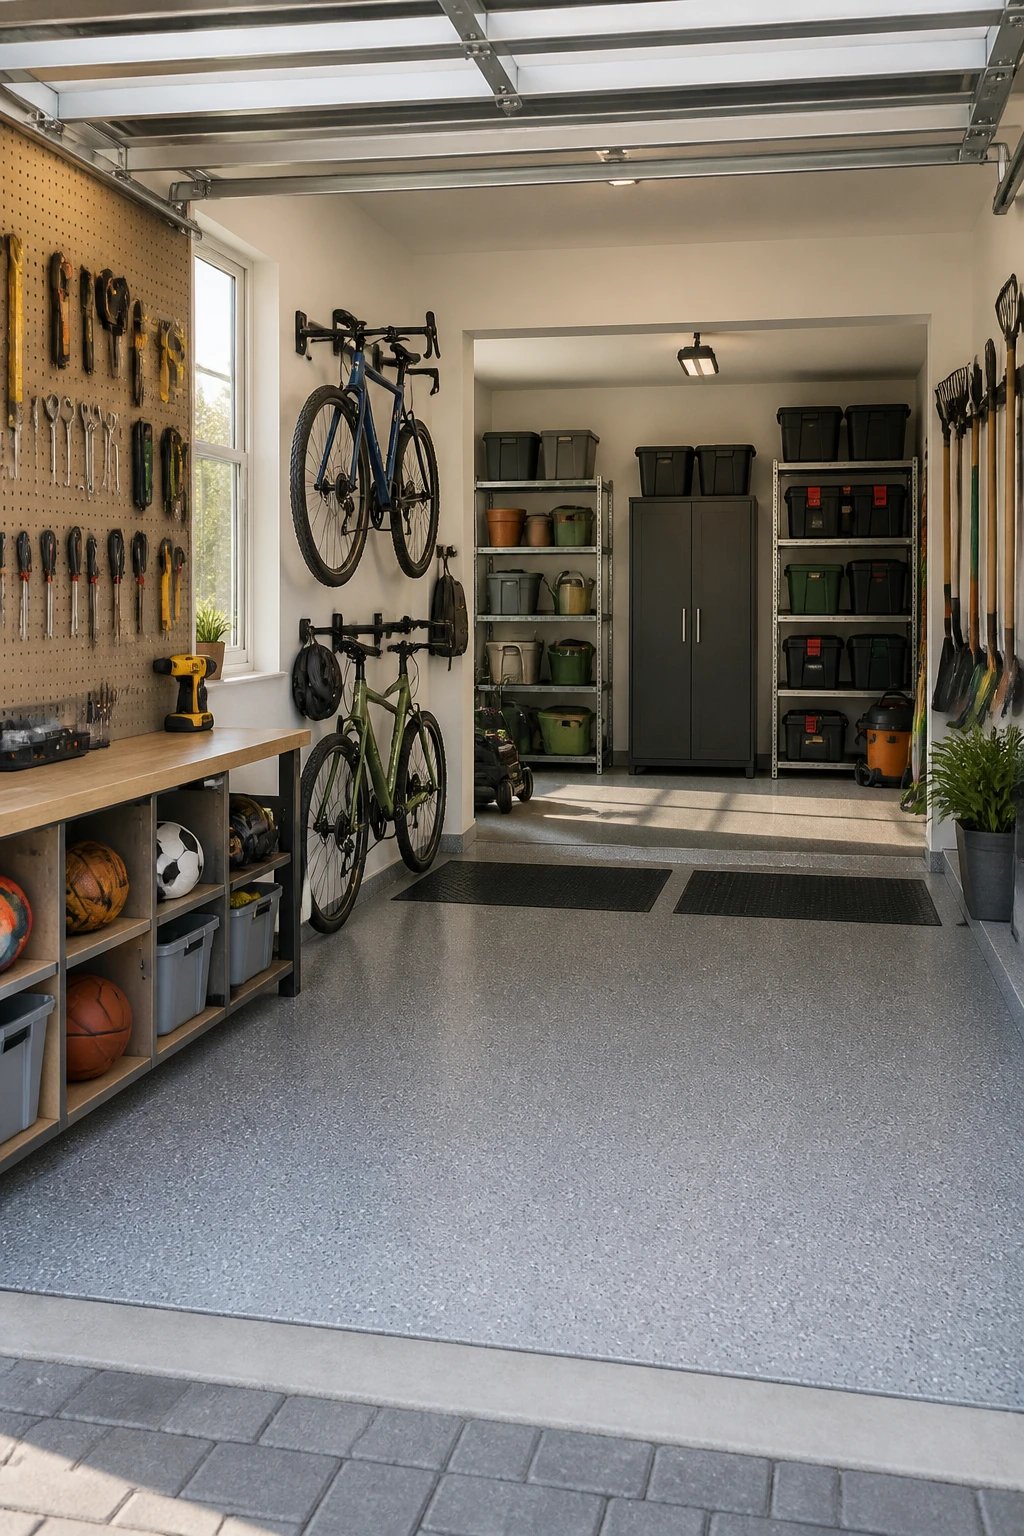
If you want a workspace you’ll actually enjoy, dedicate a back wall to a sturdy workbench, closed storage, and a big pegboard. This becomes your go-to zone for hands-on projects and tool access.
Best-First Setup
- Install pegboard first, then add a robust workbench and lockable storage cabinets.
- Use a pegboard with a variety of hooks and accessories so you can rearrange as your tool collection grows.
- Prefer a clean look? Choose pre-painted white pegboard to keep the space feeling bright and organized.
Tips to level up:
- Organize by frequency: drill and screwdriver stations near the top row for quick grabs.
- Group like tools together—hammers with hammers, screwdrivers with screwdrivers—to minimize hunting.
- Magnetic accessories are your friend for tiny metal parts—screws, nails, fasteners stick right where you need them.
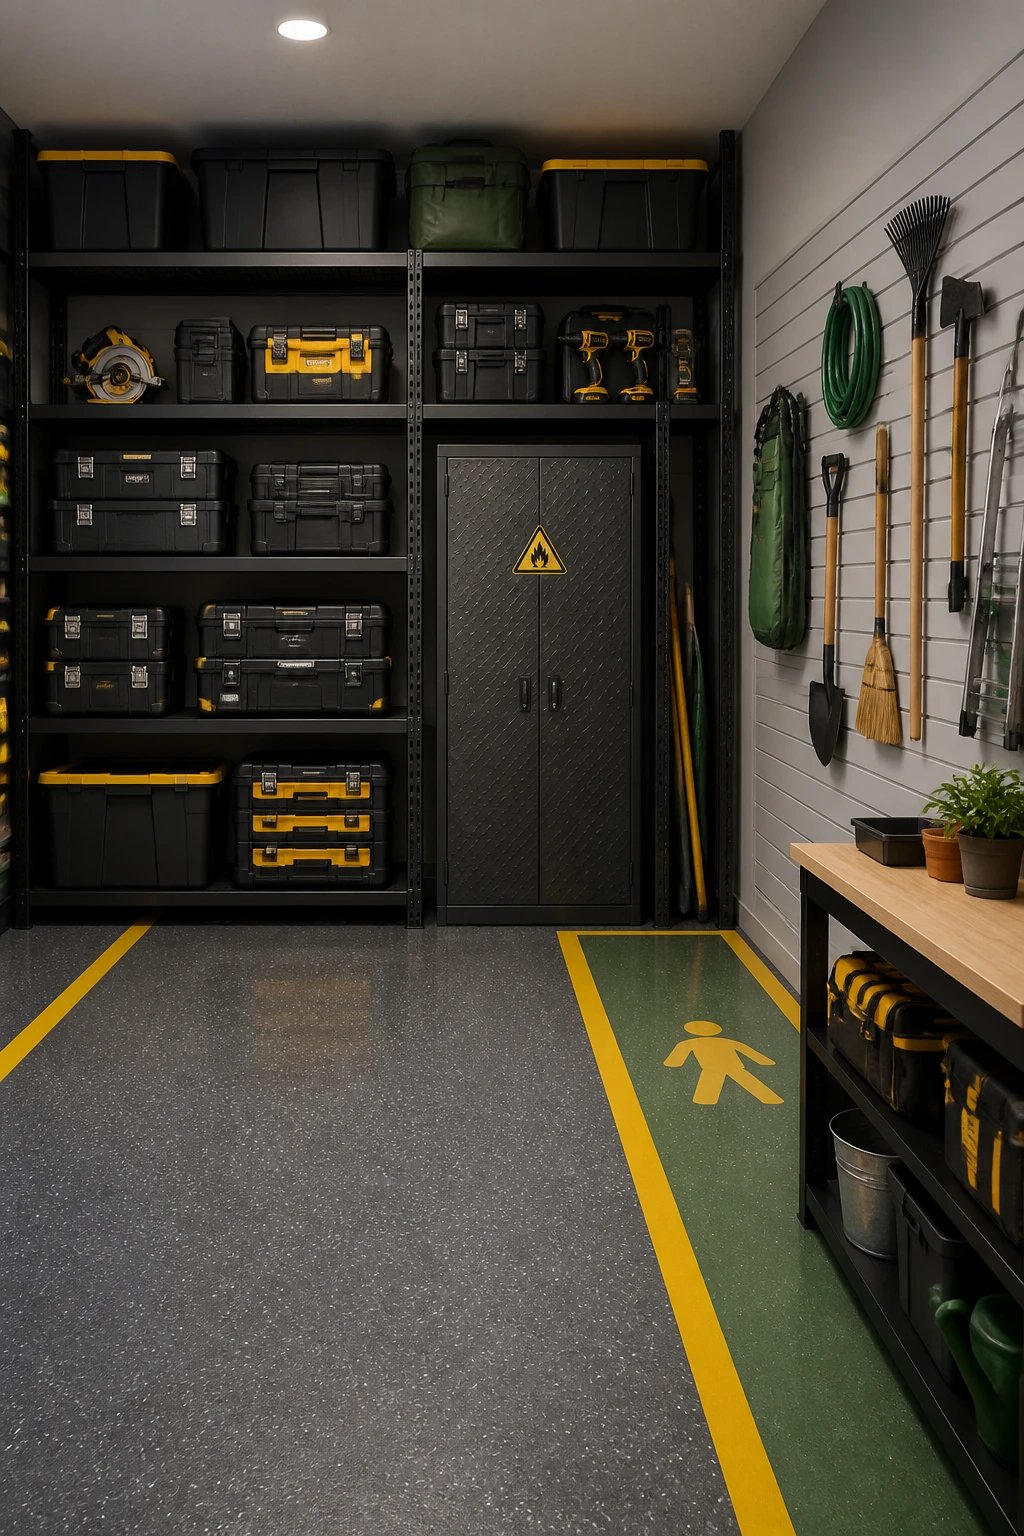
Vertical Storage Wins: Wall Tracks, Ceiling Bins, and Deep Cabinets
A tidy garage embraces vertical space. Here are three power moves that deliver big gains:
- Wall track systems for gardening gear, rakes, shovels, and small garden tools—keep them off the floor and within reach.
- Ceiling storage for seasonal items, extra decor, and spare containers—keeps the floor clear and the space airy.
- Deep, lockable cabinets for power tools and bulky equipment—think durable, dust-free, and organized behind doors.
Pro-tip: sort seasonal items together and group alike by season, so you can grab what you need in one sweep. Save time and keep the mood light and Pinterest-perfect.
Bulk and Pantry: Kitchen-Style Organization for the Garage
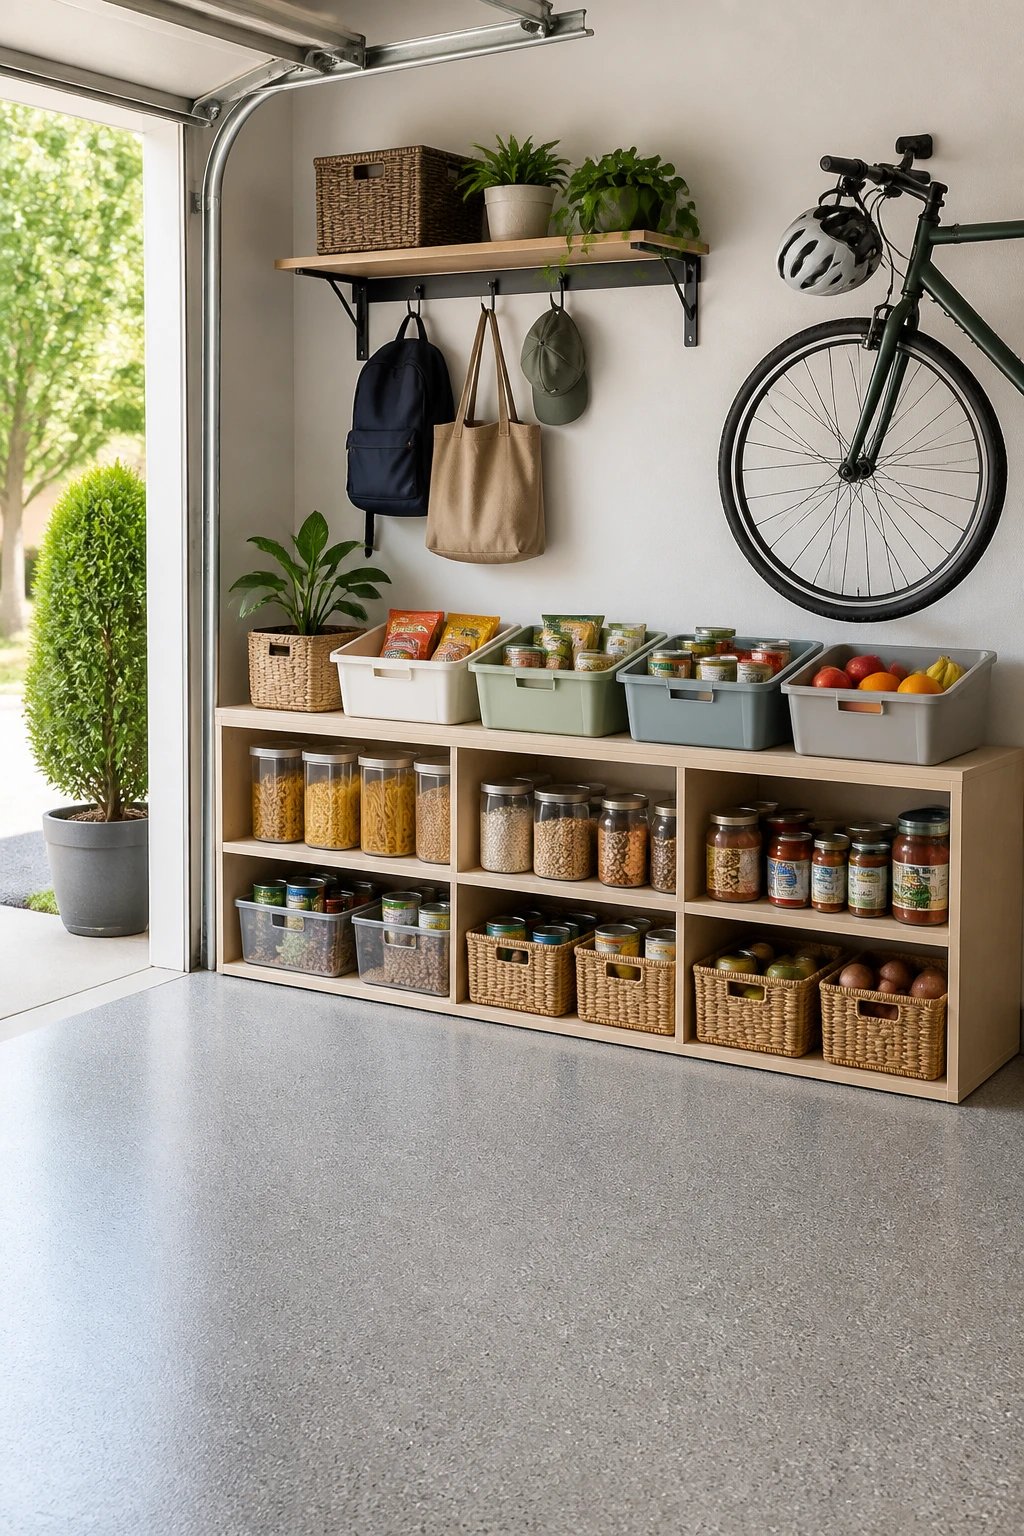
Garages aren’t just for tools—they’re often home to a second fridge or extra pantry space. Here’s how to handle bulk storage like a pro:
- Use clear, lidded bins to categorize items by type—snacks, canned goods, dry staples—so everything stays visible and accessible.
- Seal dry foods to protect from dust, pests, and moisture. Clear bins make inventory a breeze and reduce overbuying.
- Track fridge temperatures and climate needs. If you’re storing perishables in the garage, choose a climate-friendly spot and monitor temperatures to avoid spoilage.
The payoff is evident: less clutter, less waste, and a room that feels calmer even when life gets busy.
Sports, Toys, and Bikes: Clever, Kid-Friendly Storage Solutions
Oversized gear can feel like a puzzle, but it doesn’t have to be. Use a mix of smart rail systems, adjustable hooks, and DIY racks to tame the chaos:
- Adapt a rail system designed for long tools to also cradle balls, bats, and sports gear. The same hardware that holds shovels can hold baseballs with a simple bungee hack.
- Clear bins for larger equipment keep contents visible—kids (and you) will know exactly where to grab what you need.
- Build a free-standing bike rack tailored to your space and your children’s growing bikes. A simple triangle-frame rack with evenly spaced slots makes bike storage easy and safe for little ones to access.
DIY note: measure your bikes, pick the right slot spacing (for example, around 7 inches for typical kids’ bikes), and consider future growth so you don’t outgrow your rack next season. A quick coat of paint can transform a humble rack into a showcase piece for your garage.
Small Details That Make a Big Difference: Accessibility, Safety, and Aesthetic
A visually appealing, highly functional garage isn’t built by accident. Here are a few finishing touches to copy this look:
- Install a backsplash or a sturdy work surface on your bench to keep screws and small parts from rolling away.
- Lockable storage adds a layer of safety, especially if children are around or you want to protect valuable tools.
- Keep a clean line of sight to the doorway—this helps the space feel larger and more inviting.
Remember, a stylish garage is a breeze to maintain when every item has a home and every home has a label.
DIY Bike Rack Build: A Simple, Durable, On-the-Ground Solution
If ceiling or wall mounts aren’t ideal for your family, a freestanding bike rack can be a game changer. Here’s a quick overview of the concept:
- Build from simple 2x4s into a triangular frame with evenly spaced slots for bikes.
- Cut precise angles for a clean, sturdy frame—precision matters for stability as bikes come and go.
- Space slots based on your largest bike’s width and the age of your kids—growth is part of the plan.
A DIY rack gives you a flexible, affordable storage solution that grows with your family. Plus, it looks surprisingly polished when you paint it to match your garage vibe.
Save-Worthy Roundup: Pinable Product Ideas and Quick-Access Setups
If you’re building a save-worthy, Pinterest-friendly garage, here are quick reference ideas to copy exactly or adapt:
- Pre-painted pegboard for a clean, bright backdrop with easy-to-hang tool accessories.
- A large, sturdy workbench with a butcher block top and a back splash to keep small parts from rolling away.
- Ceiling storage for seasonal gear—make sure you clear space near garage doors and tracks.
- Wall tracks with multiple attachment options for rakes, shovels, baskets, and shelves.
- Clear storage bins for sports gear and bikes—visibility makes a huge difference for busy households.
FAQ: Quick Answers to Practical Garage Organization Questions
What’s the easiest way to start a garage reorganization?
Begin with a clear slate: remove everything, sort items by category, and decide front-zone vs back-zone placement. Install pegboard and a workbench first, then layer in vertical storage and bins. This creates a tangible win early on and keeps momentum going.
How should I arrange tools for fast access?
Put the most-used items in the top row of the pegboard, group like items together, and use a pegboard accessory kit to tailor hooks to different tool shapes. Magnetic organizers are excellent for tiny metal bits you don’t want to lose.
What’s a good way to store bulky sports gear?
Use a rail system that can hold bags, balls, and equipment, plus clear bins for items that don’t fit neatly on hooks. For bikes, a DIY freestanding rack sized to your space is a practical, kid-friendly option.
How should I handle bulk food storage in the garage?
Sort by type, use sealed clear bins, and keep a close eye on climate. Dry goods stay fresher in sealed storage, and clear bins help you track inventory at a glance.
Is ceiling storage really worth it?
Yes. Ceiling storage frees up floor and wall space, making room for projects and sports gear. Just ensure you’re clear of doors and tracks so you don’t accidentally block movement.
What’s a simple DIY project to begin with?
Start with a freestanding bike rack or a pegboard wall. Both are practical, visually satisfying, and scalable as your needs evolve. A little paint goes a long way to finish the look.
Conclusion: Your Dream Garage Is Within Reach
With a clear plan, smart zones, and a mix of pegboard, cabinetry, wall tracks, ceiling storage, and a custom bike rack, your garage can become a bright, organized extension of your home. It’s not about perfection; it’s about finding a system that works for you—and sticking with it. Pin this guide for later, implement section by section, and watch chaos melt away into a space you actually want to use. You’ve got this, and your future self will thank you.