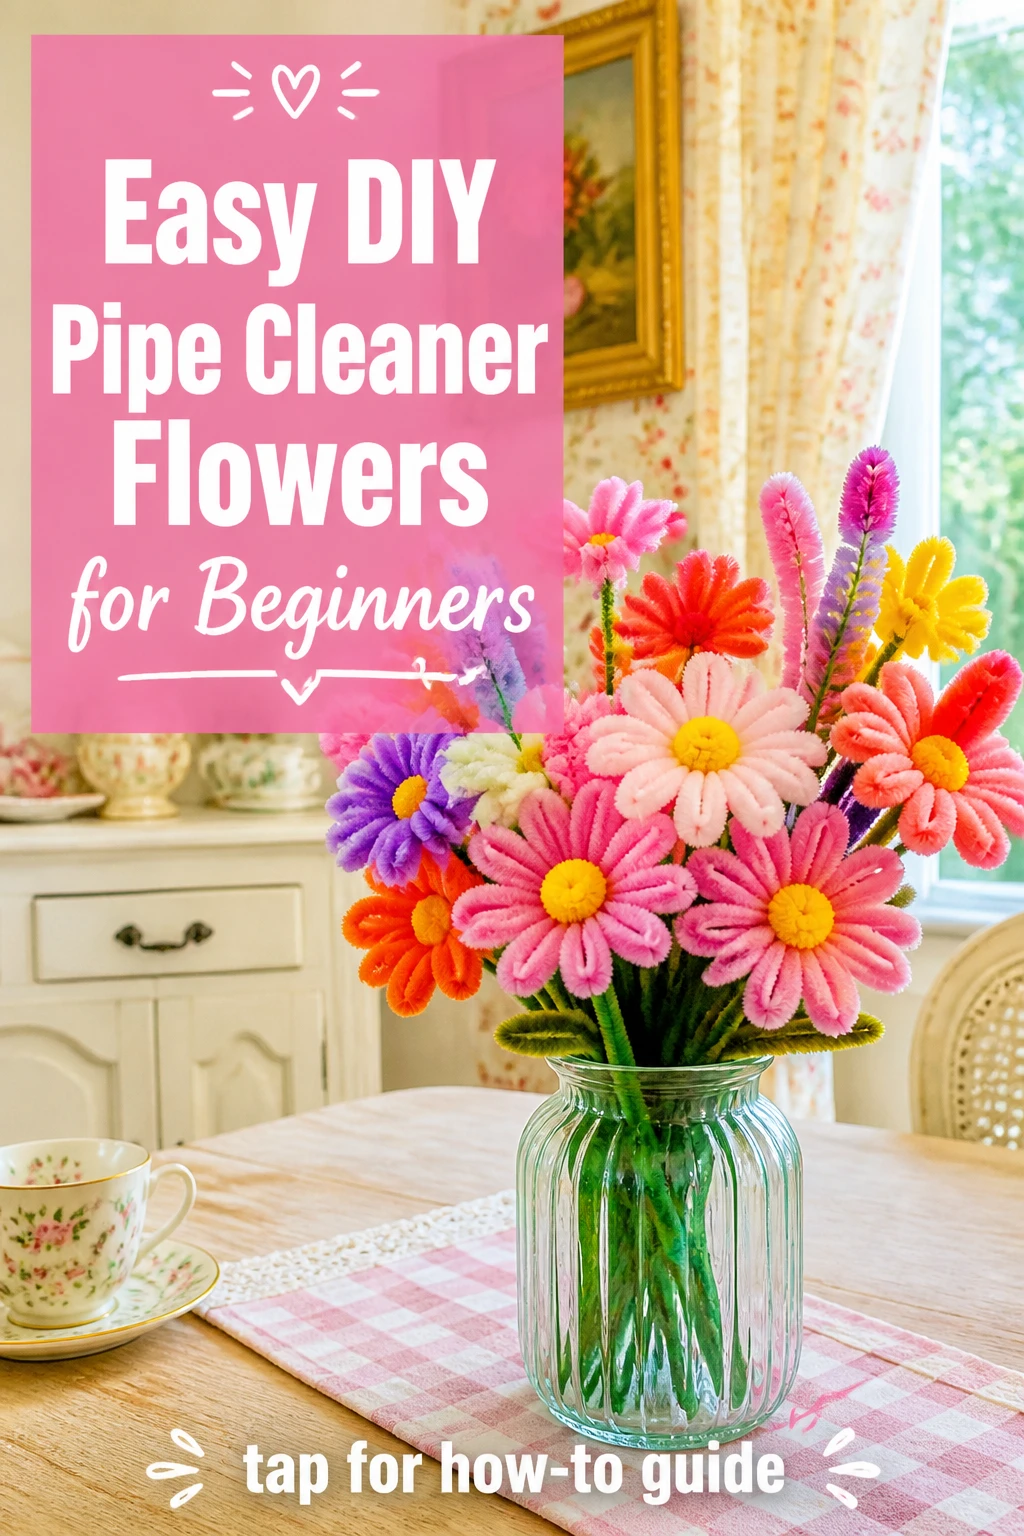
If you’ve ever wanted to DIY a bouquet without blooming real petals, this guide breaks down simple pipe cleaner flowers that look great and are beginner-friendly. We’ll walk through open lilies, daisies, tulips, and lilacs, plus tips for stems and leaves. Ready to make spring happen with just a few twisty wires?
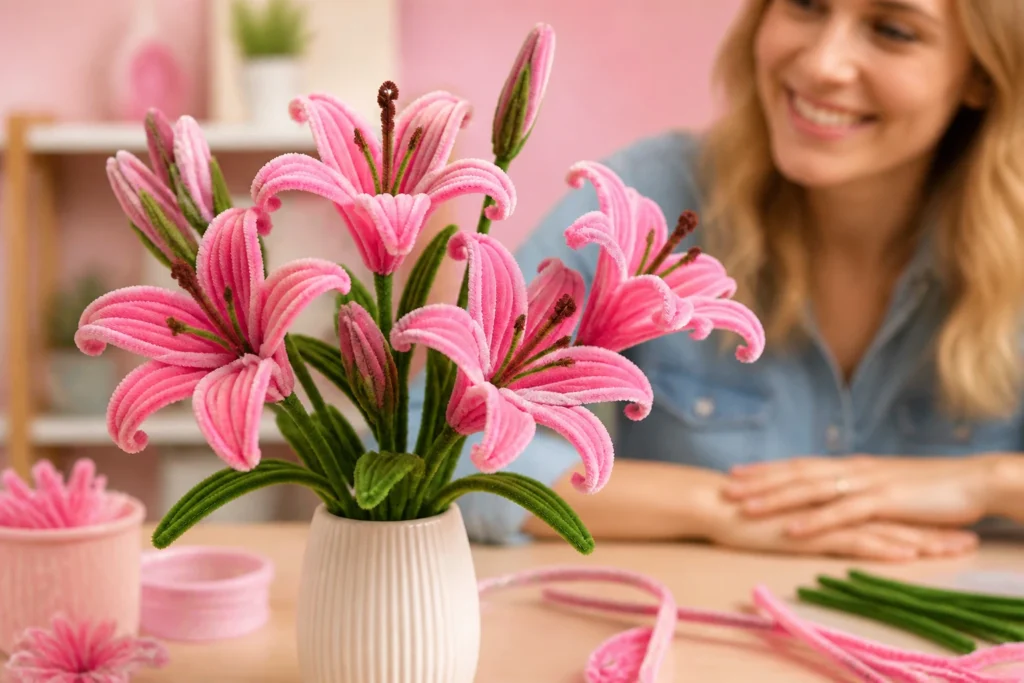
1. The Open Lily: Building the Core Petals
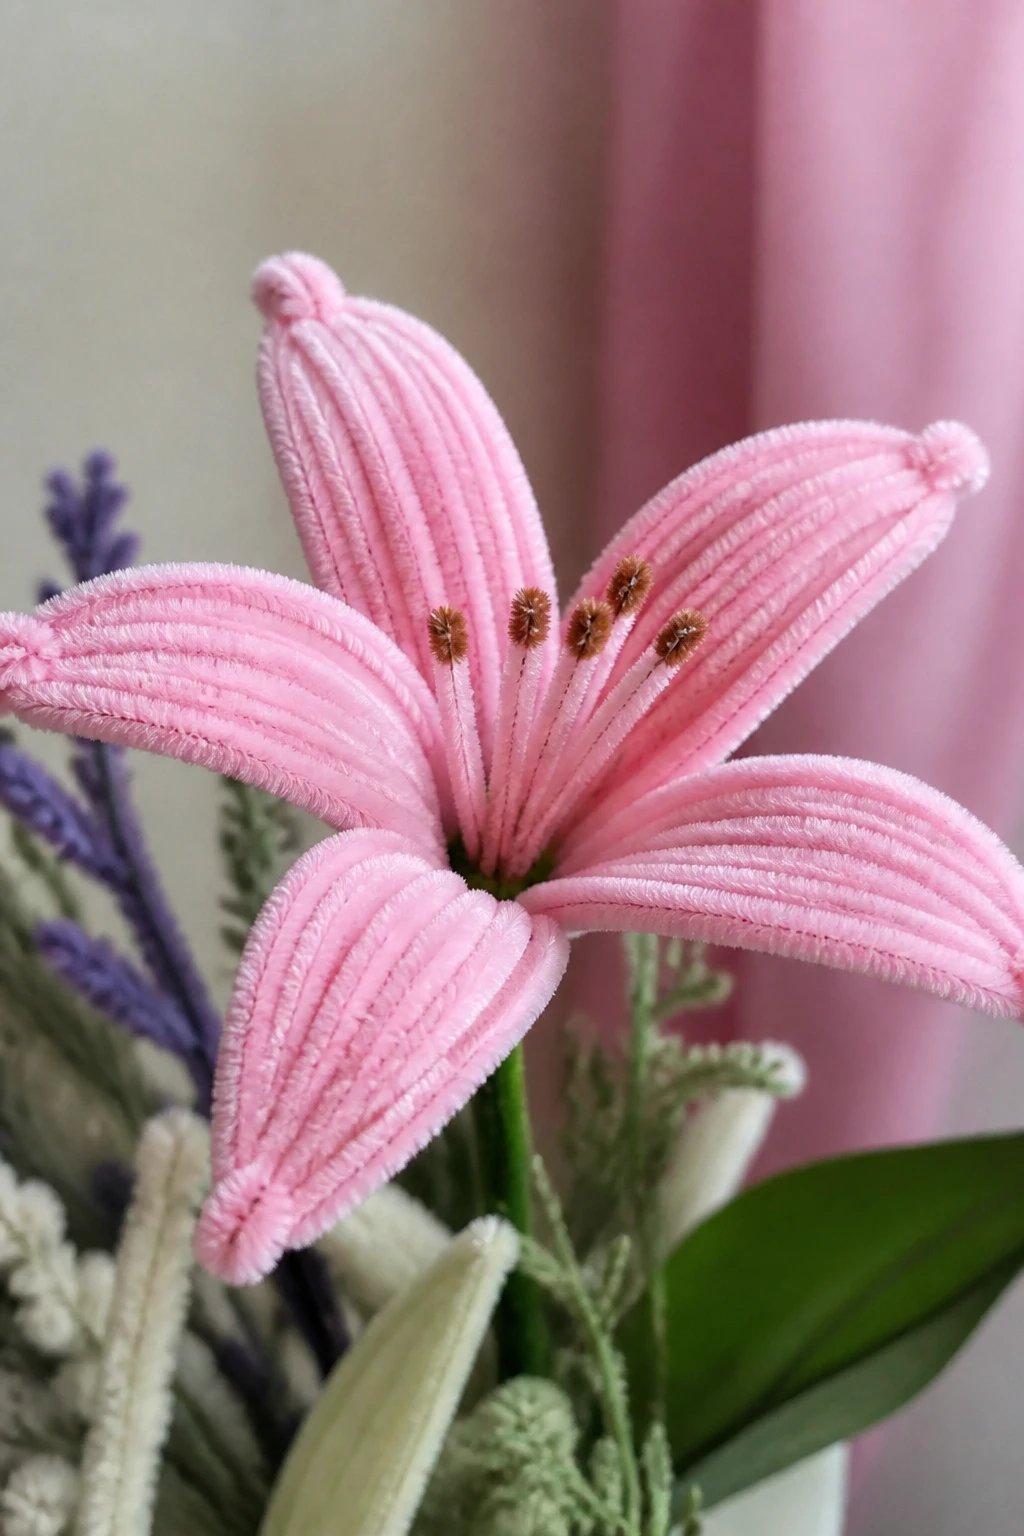
– Start with 15 pipe cleaners in the same color. Break three full-length ones in half to get six halves, setting three halves aside for later use.
– Create the first petal by folding three halves in half to form a curve at the top. Thread a full-length pipe cleaner of the same color through the curve so the halves hang like a swing.
– Bend the full-length piece, then twist the meeting point in the middle tightly (twice works well). Those twists become the petal tip.
– Untangle the six dangling halves, line them up neatly for the inside of the petal, then fold down the long ends to form the outside edge. Pinch the tip for a pointier lily petal.
– Even out uneven ends by pinching the shortest layer and twisting the bottom to secure. Add a short twist with a long end to tidy things up.
– Repeat this process until you’ve got six petals. You’ll use 15 pipe cleaners total for the whole lily, even though it feels like you’re using more.
– Lightly bend the petals away from you to make a natural curve.
- Repeat six times to complete the lily petals.
- Trim excess long ends before assembly so it’s not chunky.
2. Center and Assembly: Finishing the Lily
– For the center, cut a full-length yellow pipe cleaner into a zigzag with about 3/4 inch segments—four “spikes” work nicely.
– Pinch each spike to a point and fold in half to create rounded centers that resemble a flower’s core.
– Twist the long end around the bottom to secure all center pieces.
– Fit the center into the petals, shaping as you go. The center should peek through the petal gaps.
3. Leaves and stems: Getting the Plant to Stand
- Leaves: Use two full-length green pipe cleaners. Fold them in half to form two curves, then twist the joints twice to connect them like an X. Flatten and shape the leaf by pinching the tip for a sharp point. Trim excess at the bottom and leave a tail to attach to the stem.
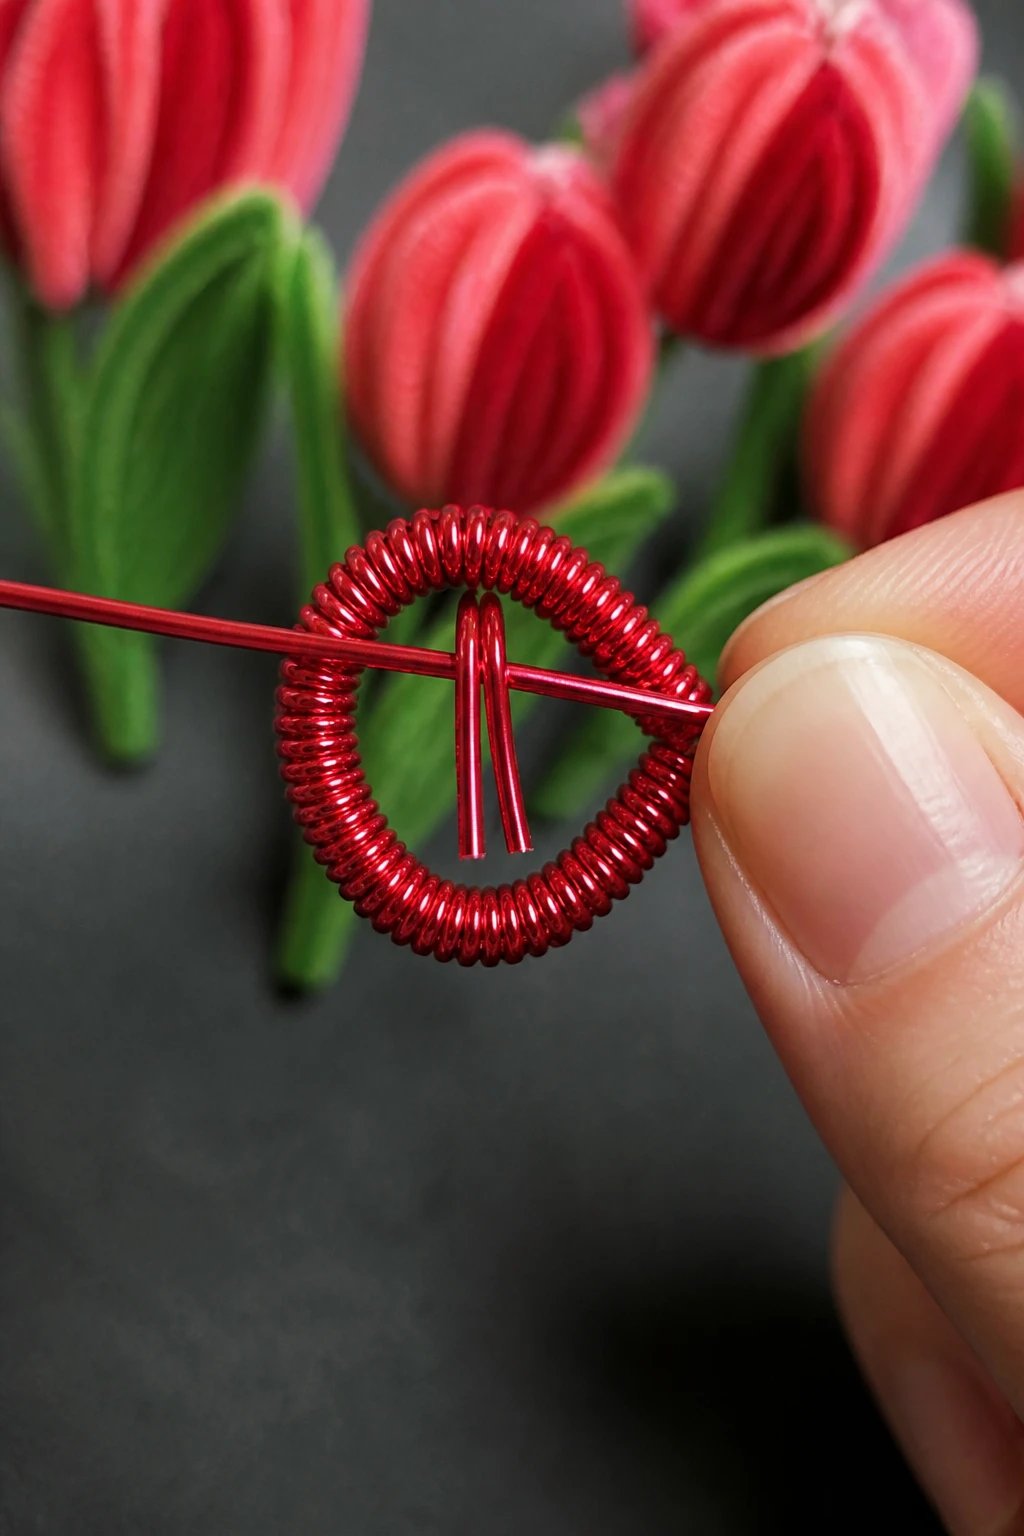
- Stem: Attach the flower to a stem using floral wire or a sturdy wire. Start with a base wrap using cheap masking tape to secure the flower onto the stem, angling the bouquet slightly to the side for a natural look.
- Leaves: Wrap the leaf tails around the stem, adding more tape as you go. If floral tape is a bust (sticking poorly, as some reviews warn), use masking tape first and then go over with green tape or even green pipe cleaners to finish the look.
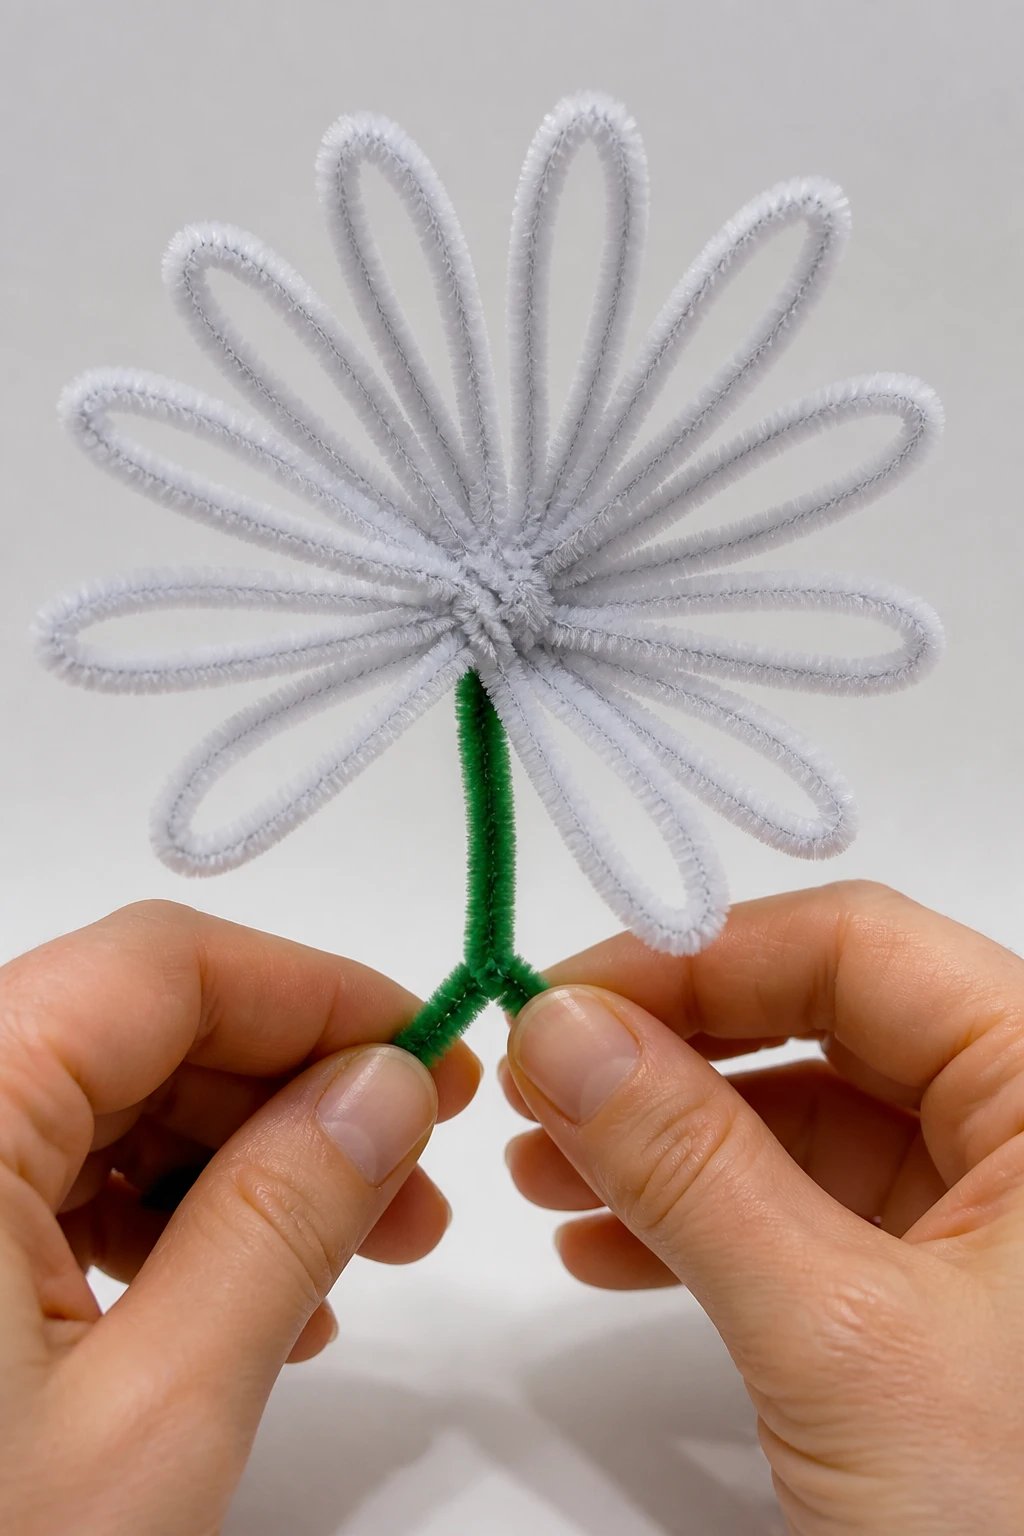
4. The Daisy Style: A Quick, High-Impact Flower
– Gather five colored pipe cleaners. Cut each full-length cleaner in half to create petal halves.
– Shape each half into a “heart” by folding to form two curves and pinching at the point. Twist the bottom twice to seal.
– Repeat about 9–10 times to form numerous petals. This creates a full daisy-like bloom.
– Create a center with one dark brown full-length pipe cleaner. Twist it into a compact circle; if you want a larger center, add a second pipe cleaner to the side.
– Glue the petal bundles around the center, working from the outside in. Pack tightly so the center isn’t visible from the front.
– Pinch and shape the petals to lift toward the light for a sunny, full look.
5. The Tulip: A Closed, Compact Bloom
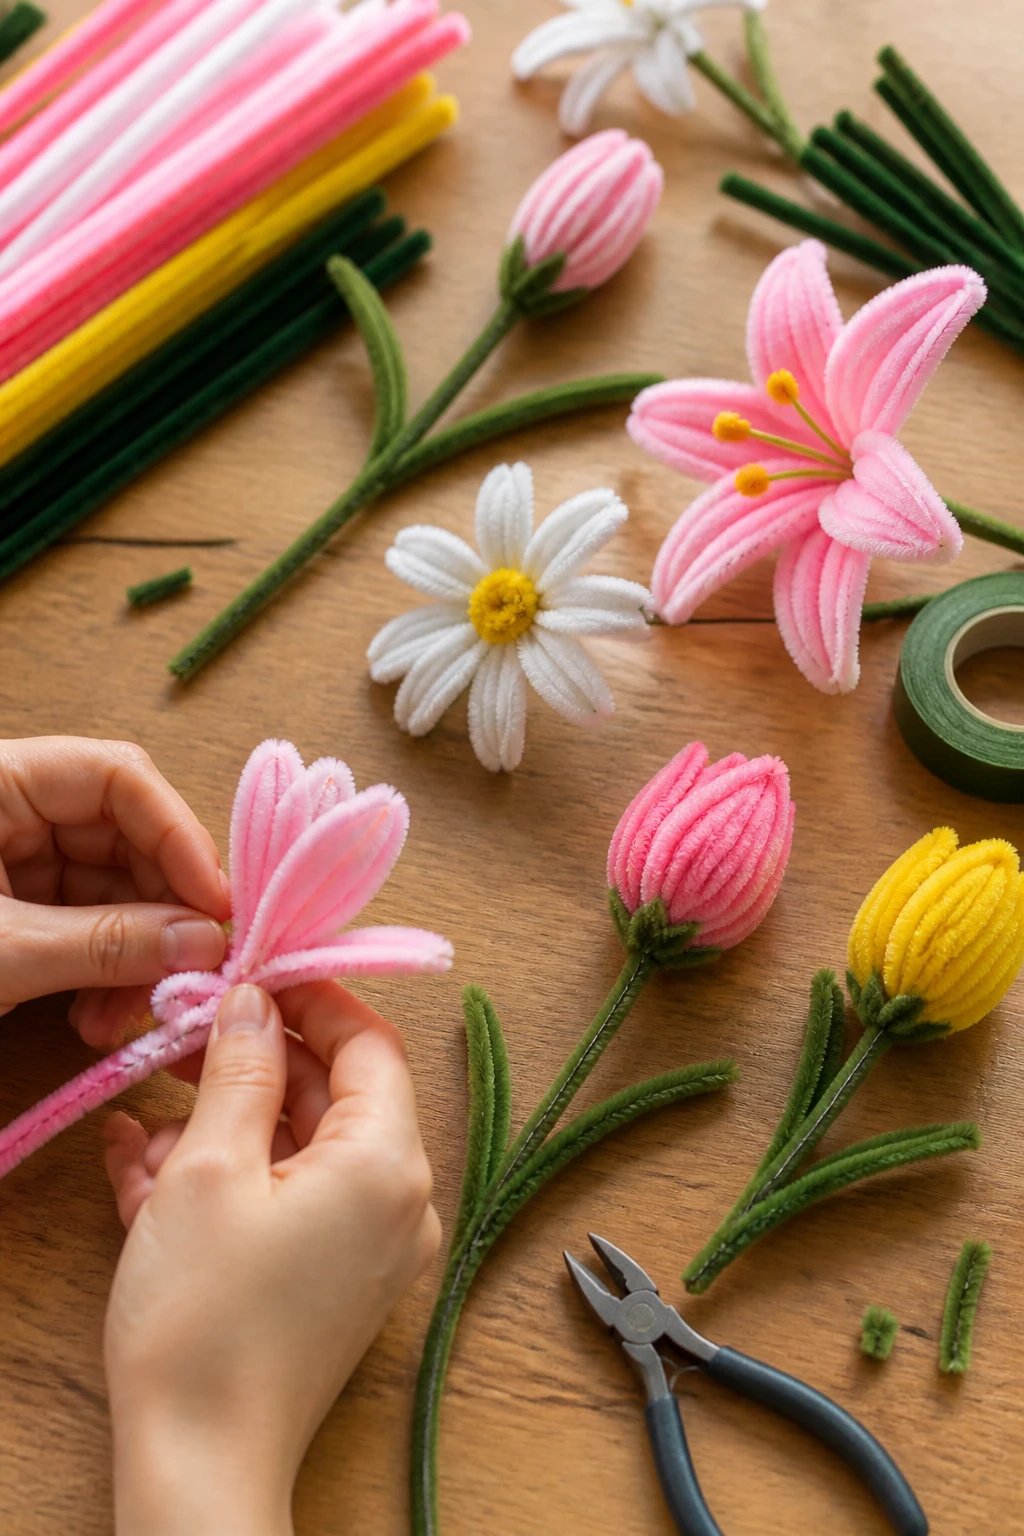
– Use 10 pipe cleaners total. Take three full-length cleaners and cut them in half, leaving three halves aside for later.
– Form petals as with the open lily: three halves, a full-length cleaner threaded through, and a double-twist at the shared joint.
– Once you make four petals, you’ll glue and arrange them to create a closed shape. Bend the petals slightly inward so the bloom stays compact instead of fanning out.
– Glue them in a circle, making sure the bottom edges align to keep the tulip closed. Add another layer of petals if you want more depth.
– Optional center: glue a small disk or smaller piece into the flower’s middle for a finished look.
– Leaves: Build two green leaves with two full-length pipe cleaners. Twist the middle to form an X, flatten, and shape the leaf edges. A pointy tip and a short bottom tail finish the look.
– Attach the tulip to the stem by wrapping tape around the base and down the stem. If the green floral tape is not sticky, wrap with masking tape first and then cover with green tape for color continuity.
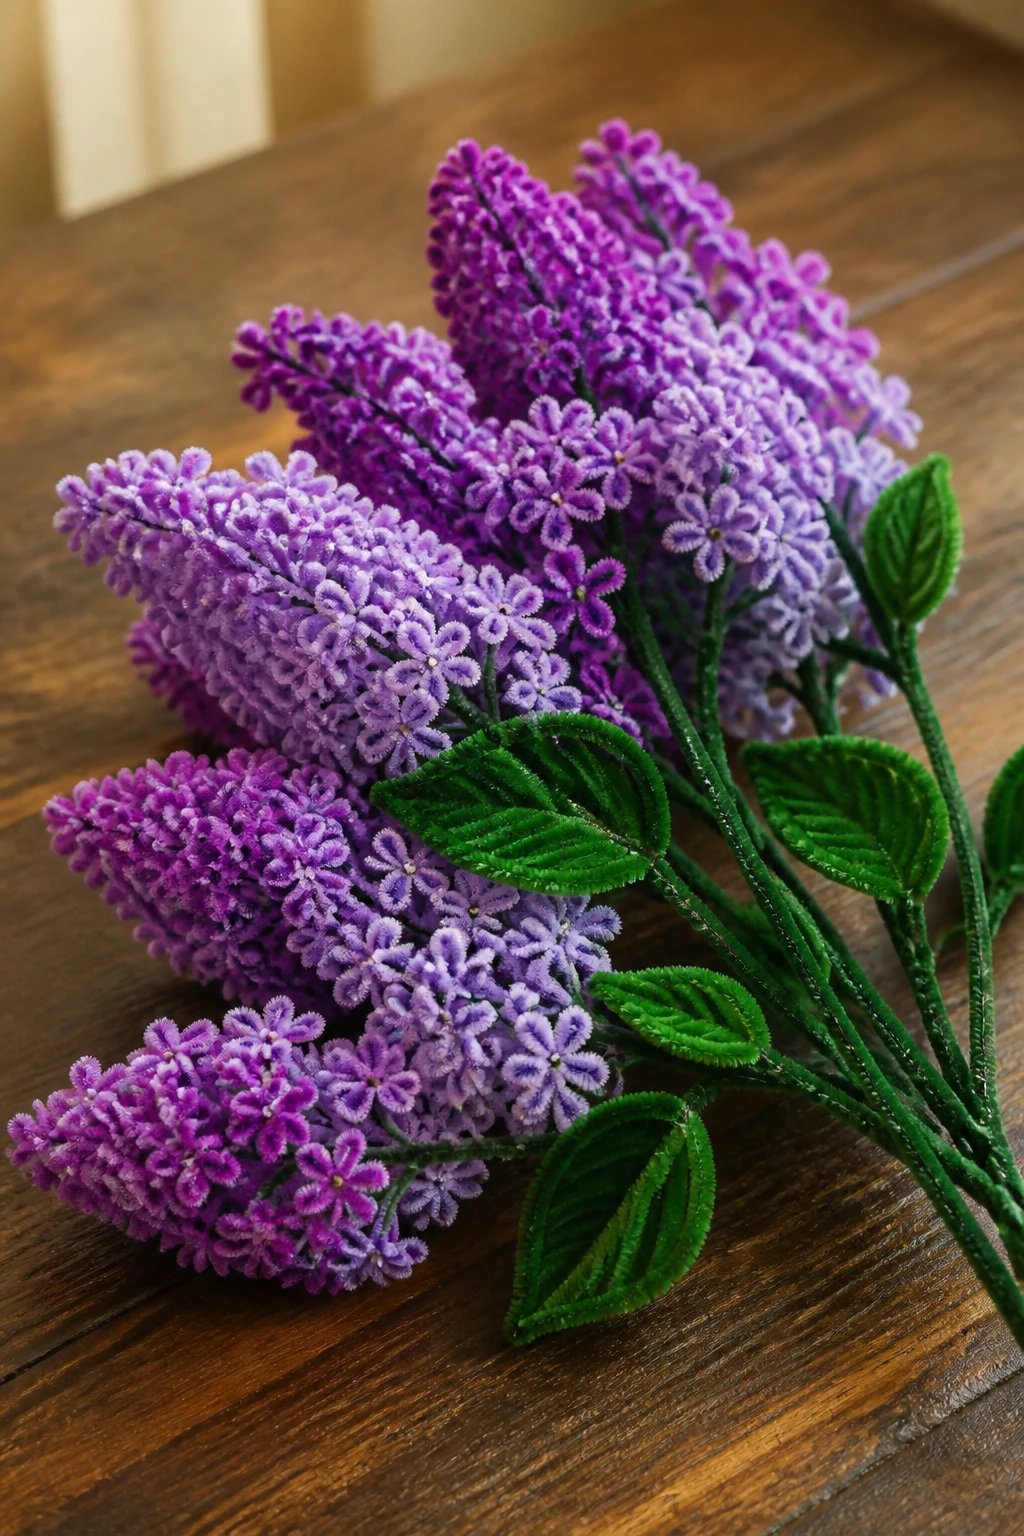
6. The Lilac: Color-Stacked Petals for Depth
– Choose multiple purple shades. Cut a 12-inch pipe cleaner in half to make halves; then cut the halves again into quarters for the smallest petals.
– Create simple “petals” by folding each quarter in half to form a curved shape, pinching at the point. Twist the ends to connect, forming small petal clusters.
– Repeat to assemble many tiny petals. The lilac gets its color gradient by stacking petals of different shades down the stem.
– Rather than linking petals to each other, glue them directly onto a floral wire stem. Start at the top with the lightest shade, then layer progressively darker tones as you descend.
– Add leaves by combining two green pipe cleaners into a connected leaf (twist twice, flatten, shape), then attach along the stem with masking tape or floral tape.
– Finish by wrapping the entire stem with green tape to ensure a cohesive look.
7. Quick Pro Tips and Common Pitfalls
– Tape matters: If your green floral tape is not sticky, the entire wrap may slide. FYI, masking tape can work as a temporary base—just cover it with colored tape later to keep things neat.
– Keep petals from getting chunky: Trim long ends where you plan to connect to the stem, so the bloom looks balanced.
– Plan your colors: You can mix shades for a more natural look (especially with lilacs and tulips). A little contrast makes the flower feel more alive.
– Don’t over-twist: A tight twist helps the petals hold their shape but too many twists can stiffen the bloom. Find the right balance.
8. Quick Troubleshooting: When Things Don’t Stick
– If the tape won’t stick to the wire, try wrapping with masking tape first and then applying floral tape on top. Green floral tape can be temperamental, especially if it’s cheaply made.
– If petals look lopsided, give each petal a gentle pinch at the tip and adjust the bottom twist to even things out. Small tweaks make a big difference.
FAQ
How many pipe cleaners do I need for a lily?
You’ll typically use about 15 pipe cleaners for a full open lily, even though it may feel like more. Some extras are kept aside in the process for petal assembly.
Can I skip the glue and glue gun?
Glues help hold the petals together especially when you’re assembling the circle of petals. If you avoid glue, you’ll need a tight, confident twist to keep pieces secured, which can be tricky for beginners.
What’s the easiest flower to start with?
The daisy-style flower is often the simplest place to begin because you’re mainly assembling simple petal shapes around a central core. It’s a great confidence booster before tackling lilies or lilacs.
Which tape works best for the stem?
Green floral tape is ideal for the visible parts of the stem, but it can be slippery if it’s low-quality. If you have trouble, mix in masking tape first and then cover with green tape or green pipe cleaners for texture and color.
How can I make the lilac look realistic?
Color layering is key. Use multiple shades of purple and glue petals directly onto the wire with staggered spacing. Begin with the lightest shade at the top and deepen the color toward the bottom for depth and a natural gradient.
Conclusion: Your Tiny Garden Starts Here
These pipe cleaner flowers prove you don’t need a green thumb to enjoy a lush, crafty bouquet. With a handful of supplies, some quick twists, and a little patience, you can whip up an open lily, a cheerful daisy, a neat tulip, and a fragrant lilac. FYI, your friends might actually think you spent hours on them—when really, we both know it took just a few creative twists. So grab your pipe cleaners, pick a color palette, and start building your springtime shrine in seconds.
If you want more tips or a refresher on any step, drop a comment and I’ll walk you through it. And if you end up with a fantastic bouquet, share a photo—I’ll cheer you on. Happy crafting, friends!