If you’ve ever stared at your garage wall and wished for a chic, tidy entryway, you’re in the right place. This guide takes you from cluttered chaos to a stylish, practical mudroom makeover that you can actually replicate. Think warm beadboard, hidden storage, and clever cubbies—all within a sensible budget. Ready to steal this look and pin-ready results? Let’s dive in.
1. Build Cute Closed-Cubby Storage That Hides the Mess
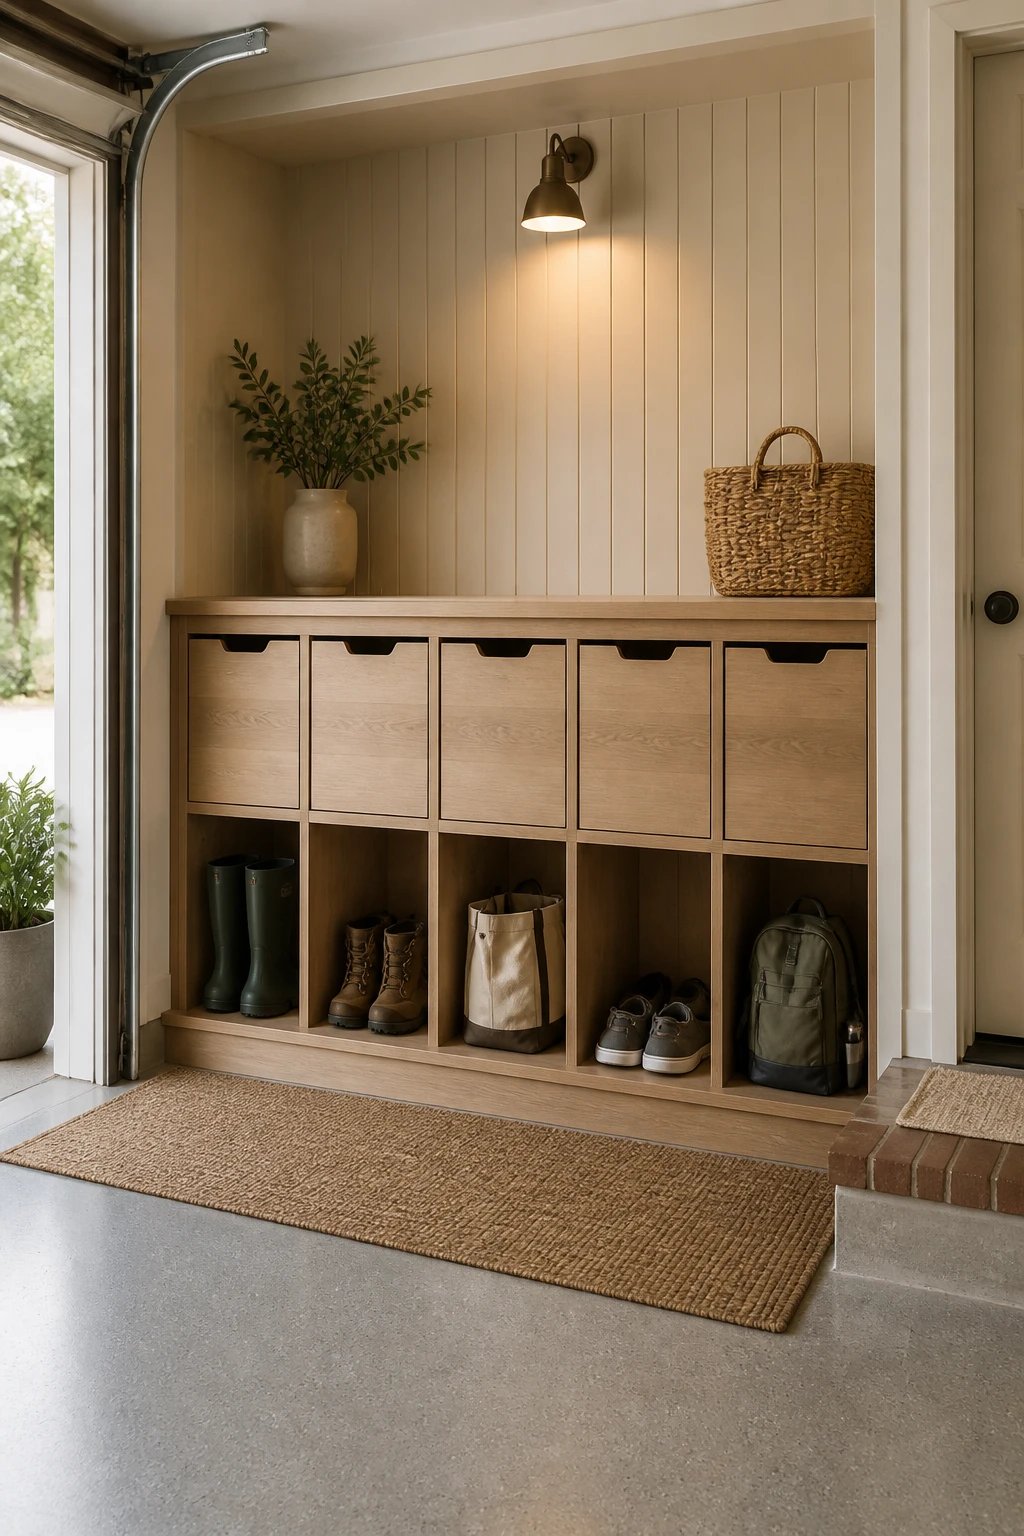
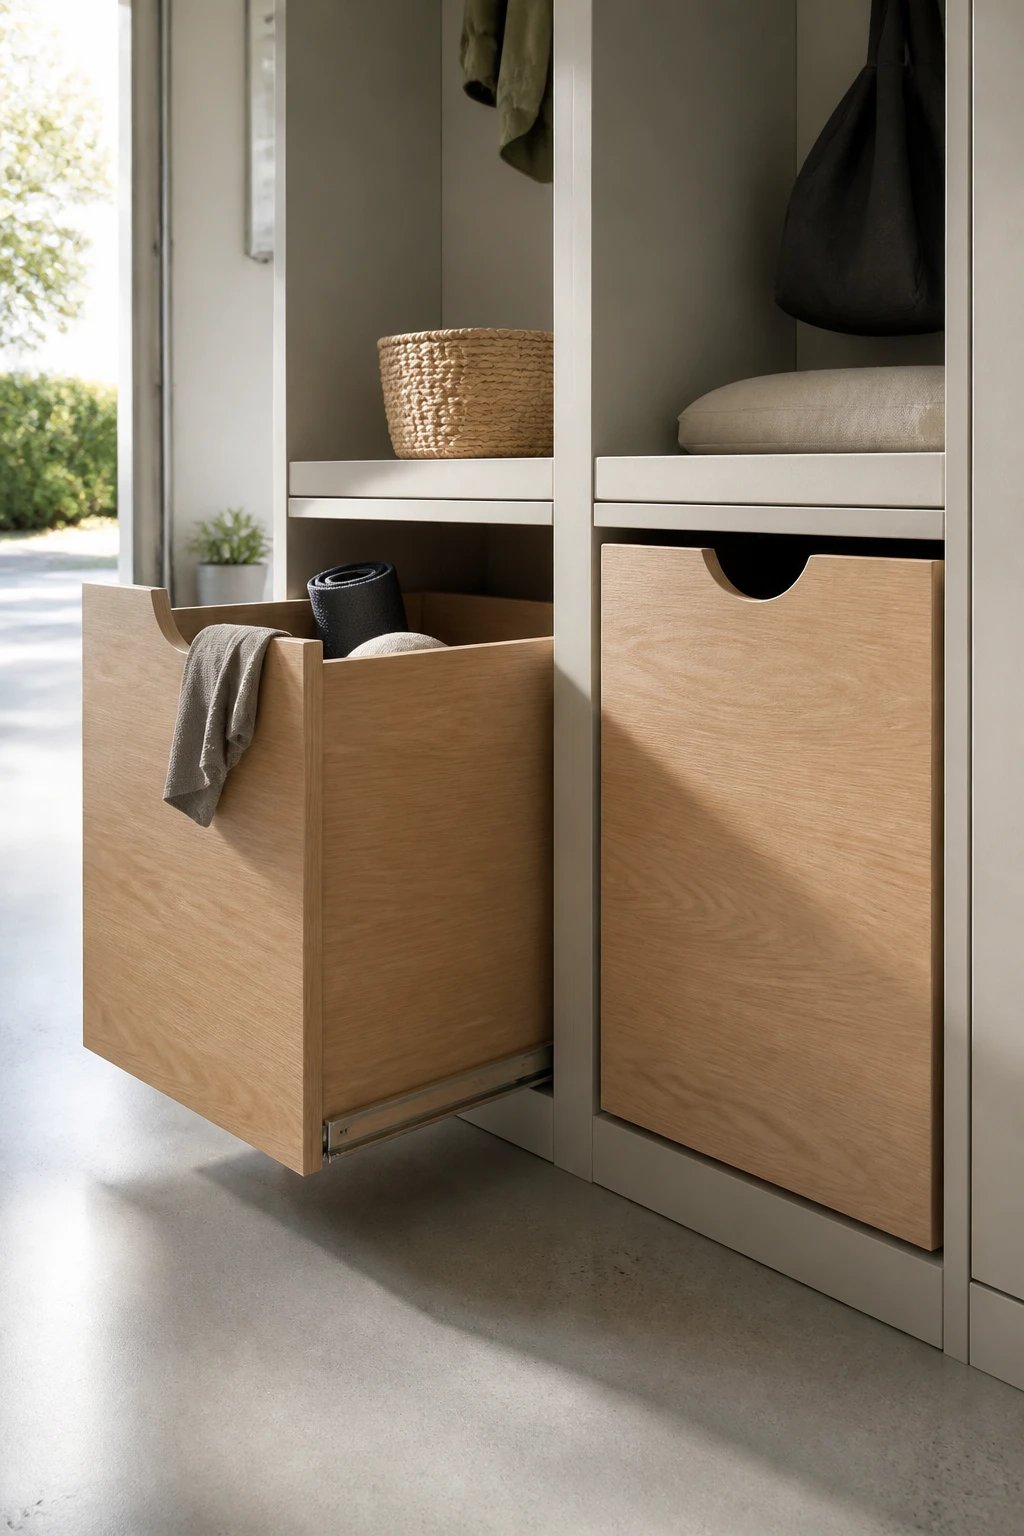
Open cubbies scream “stuff everywhere, please.” Closed storage keeps the entryway neat while still feeling welcoming. Start by framing a set of uniform cubbies near the floor to capture shoes, umbrellas, sports gear, and accessories. Instead of leaving everything exposed, tuck in simple wooden bins that slide in and out with ease. These bins hide the clutter, but you can still see a neat, organized layout at a glance.
Why this works for Pinterest readers: the clean lines and hidden storage create a spa-like calm in a busy entry, perfect for saving and sharing.
2. Create a Centerpiece That Works for Larger Gear
Next, allocate a taller, upright panel in the middle for coats, backpacks, and other bulky items. This keeps daily essentials at eye level and easy to grab on the way out the door. If you want to punch up the style, add beadboard behind this section. It adds texture and a refined backdrop, making the space feel curated rather than makeshift.
3. Cabinet-Top Magic: Closed Storage Heads to the Ceiling
To maximize every inch, cap the setup with wall cabinets on top. These are your hidden hero—perfect for seasonal gear, hats, gloves, and spare totes. The closed doors keep the look clean and reduce visual clutter, which is exactly what you want in a high-traffic mudroom.
Choose shaker-style or flat-panel doors for a modern vibe.
Consider adjustable shelves inside for flexible storage.
Measure carefully to ensure cabinet doors don’t collide with ceiling tiles or lights.
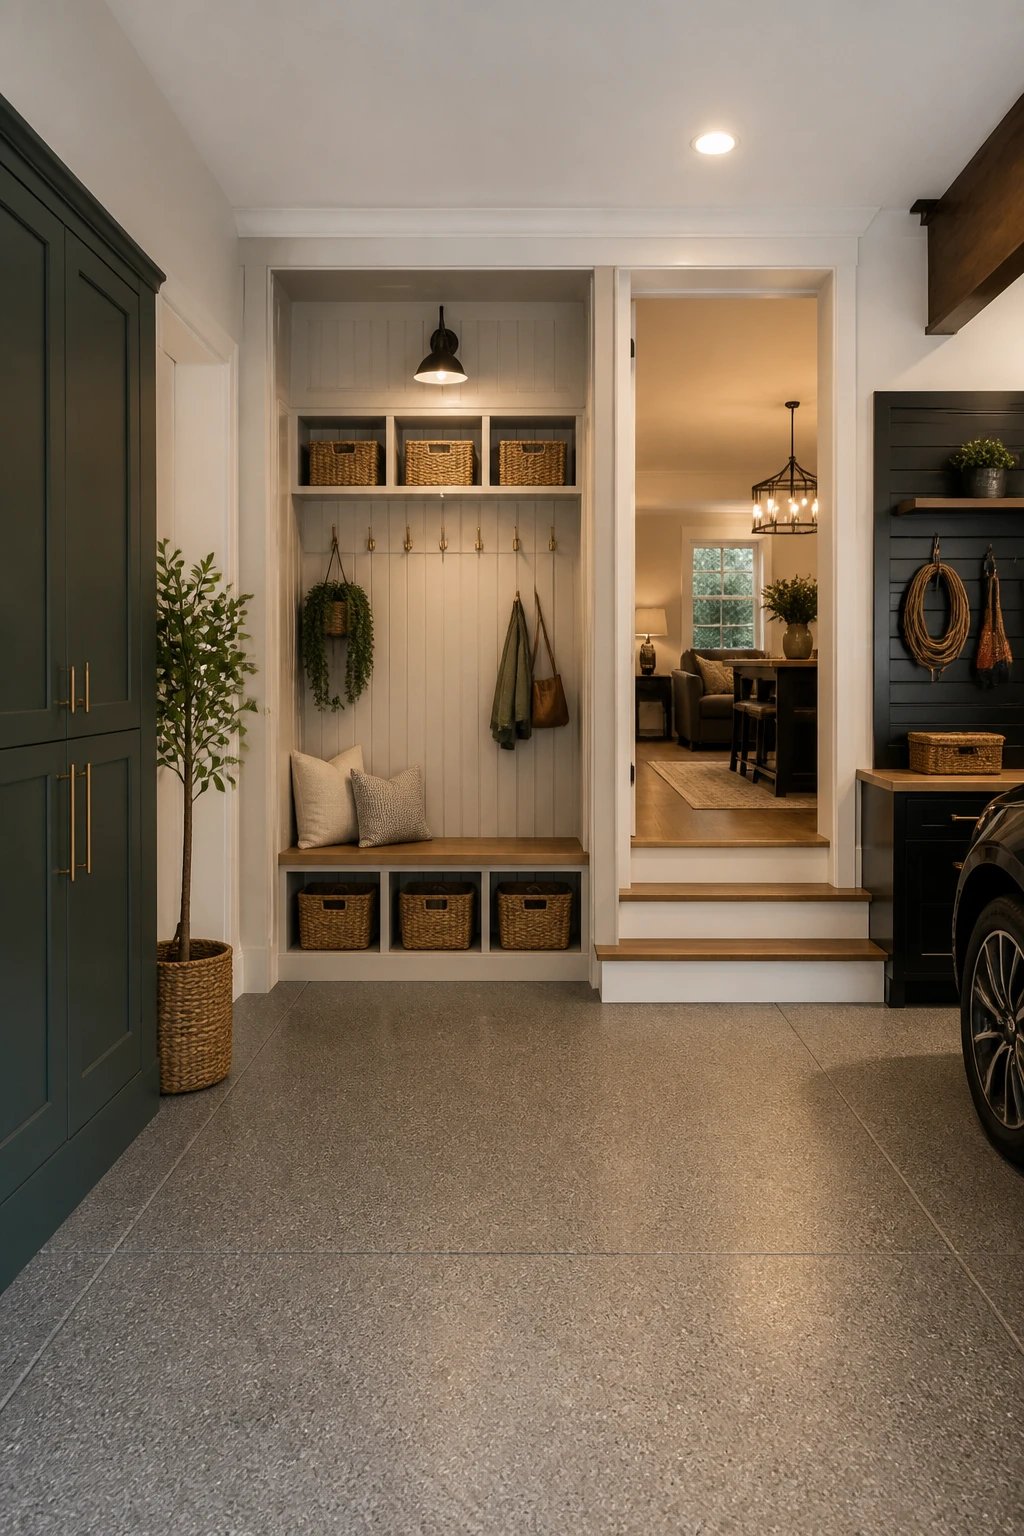
4. Finish with Beadboard for Instant Charm
Beadboard adds a touch of cottage-cozy sophistication without breaking the bank. Attach the beadboard to the wall behind the middle section to create a focal wall that feels custom and warm. The vertical lines visually elongate the space, making a small mudroom feel bigger and more intentional.
5. Paint for a Fresh, Durable Look
A fresh coat of paint energizes the whole makeover. Choose a light, neutral base to reflect light and keep the space bright. If you love a pop of personality, add an accent color to the cabinet doors or the beadboard trim. Durable, washable paint is a wise choice for high-traffic areas—spills and scuffs happen, and you’ll want to wipe them away in a snap.
6. How to Plan and Execute a Budget-Friendly Mudroom Makeover
This project blends smart budgeting with high-impact styling. Here’s a quick roadmap to keep you on track and inspired:
Sketch your layout: bottom cubbies, a middle tall section, and top cabinets to balance function and form.
Source simple wooden bins for a cohesive, hidden-storage look.
Shop prefab kitchen wall cabinets that fit your space and budget.
Attach beadboard as a backer behind the middle section for instant texture.
Finish with paint and a few hardware touches that vibe with your home.
7. Personalize Your Mudroom: 5 Easy Styling Tricks
Your mudroom should feel like you. These small touches pull the look together and are incredibly pin-worthy:
Label bins and hooks in a consistent font or style for a tidy, organized feel.
Add a small bench or seating area where shoes can be removed comfortably. A cushion in a cheerful fabric makes it inviting.
Incorporate a couple of decorative baskets for mail, receipts, or gloves that don’t need to be hung.
Install a wall-mounted mirror to help with last-minute outfit checks and to bounce light around the space.
Use a durable, easy-to-clean rug at the entry to trap dirt but keep the space welcoming.
8. Save-Worthy Design Details You Can Copy Now
Keep these details in mind as you build your own entryway-style mudroom:
Hidden storage via cabinet doors immediately reduces visual clutter, making the space look bigger and more polished.
Beadboard backdrop adds architectural interest without a full renovation. It’s the “I did this myself” glow-up.
Vertical space is your best friend. Tall cabinets and beaded panels draw the eye upward, opening up narrow walls.
9. Frequently Asked Pinterest-Style Questions
How do I design a mudroom in a small garage space?
Be deliberate with vertical storage, choose modular components, and use closed cabinetry to keep surfaces clean. A beadboard wall adds texture without consuming space. Save this layout as a blueprint you can tweak for your own dimensions.
What finishes look best in a garage makeover?
Neutral paint with a soft sheen, beadboard, and wood-toned bins create a cohesive, inviting look that reads premium on Pinterest. Durable paints and water-resistant finishes are key in garage environments.
How can I maximize storage without a full renovation?
Lean into ready-made wall cabinets, stackable bins, and a backed beadboard accent. You’ll achieve a high-end vibe without tearing into walls or breaking the bank.
Which features make a mudroom feel put-together?
A clear hierarchy: hidden storage at the bottom, open display zones in the middle, and closed cabinetry on top. Add a few decorative, functional touches—like labeled bins and a bench—to finish the look.
What’s the easiest way to maintain this space?
Establish a quick daily routine: hang coats, return items to bins, and wipe surfaces during regular cleaning. A small rug and wipeable paint help with daily maintenance.
10. Maintenance Habits for Long-Lasting Style
The key to keeping your mudroom gorgeous is consistency. Here are simple routines:
Weekly: return items to their bins, wipe down beadboard and cabinet doors, and quickly dust surfaces.
Monthly: inspect hardware, tighten screws, and rearrange bins if needed to accommodate new gear.
Seasonally: refresh paint touch-ups and swap in seasonally appropriate bins or baskets to reflect your lifestyle changes.
Conclusion: Your Stylish, Functional Entryway Is Within Reach
A garage-turned-mudroom can be both beautiful and incredibly practical. By framing sturdy cubbies, adding hidden storage, introducing beadboard as a backdrop, and topping it with tall cabinets, you create an entry that feels custom and lived-in in the best way. Pin this plan, tweak the colors to fit your home, and start collecting the materials—your future organized mornings will thank you.
FAQ: Quick Answers for Your DIY Mudroom Dreams
What is the first step to starting a mudroom makeover?
Map out your space, decide on a layout (cubbies at the bottom, a middle storage zone, and top cabinets), and choose a paint color that will anchor the whole design. This foundation makes every other choice easier.
How do I choose between open cubbies and closed storage?
Mix is best: use open cubbies with stylish wooden bins for everyday items and closed cabinets for seasonal gear and accessories. This combination keeps the space visually light while staying organized.
Can I DIY beadboard if I’m not handy with walls?
Absolutely. Beadboard panels are forgiving and easy to cut. Secure them to studs, caulk the edges, and paint for a seamless finish. The result looks custom without being complicated.
What colors make a small mudroom feel larger?
Light neutrals with a subtle contrast for trim or cabinet doors work wonders. Add white or light gray beadboard for texture without shrinking the space visually.
How can I involve the family in keeping the mudroom tidy?
Label bins and hooks with simple, readable tags. Create a small, daily routine like “hang, then store” so everyone knows where to put things. A touch of humor helps, too—friendly reminders make chores feel easy.
This post may include affiliate links. Some are Amazon: As an Amazon Associate, I earn from qualifying purchases. See affiliate disclosure.