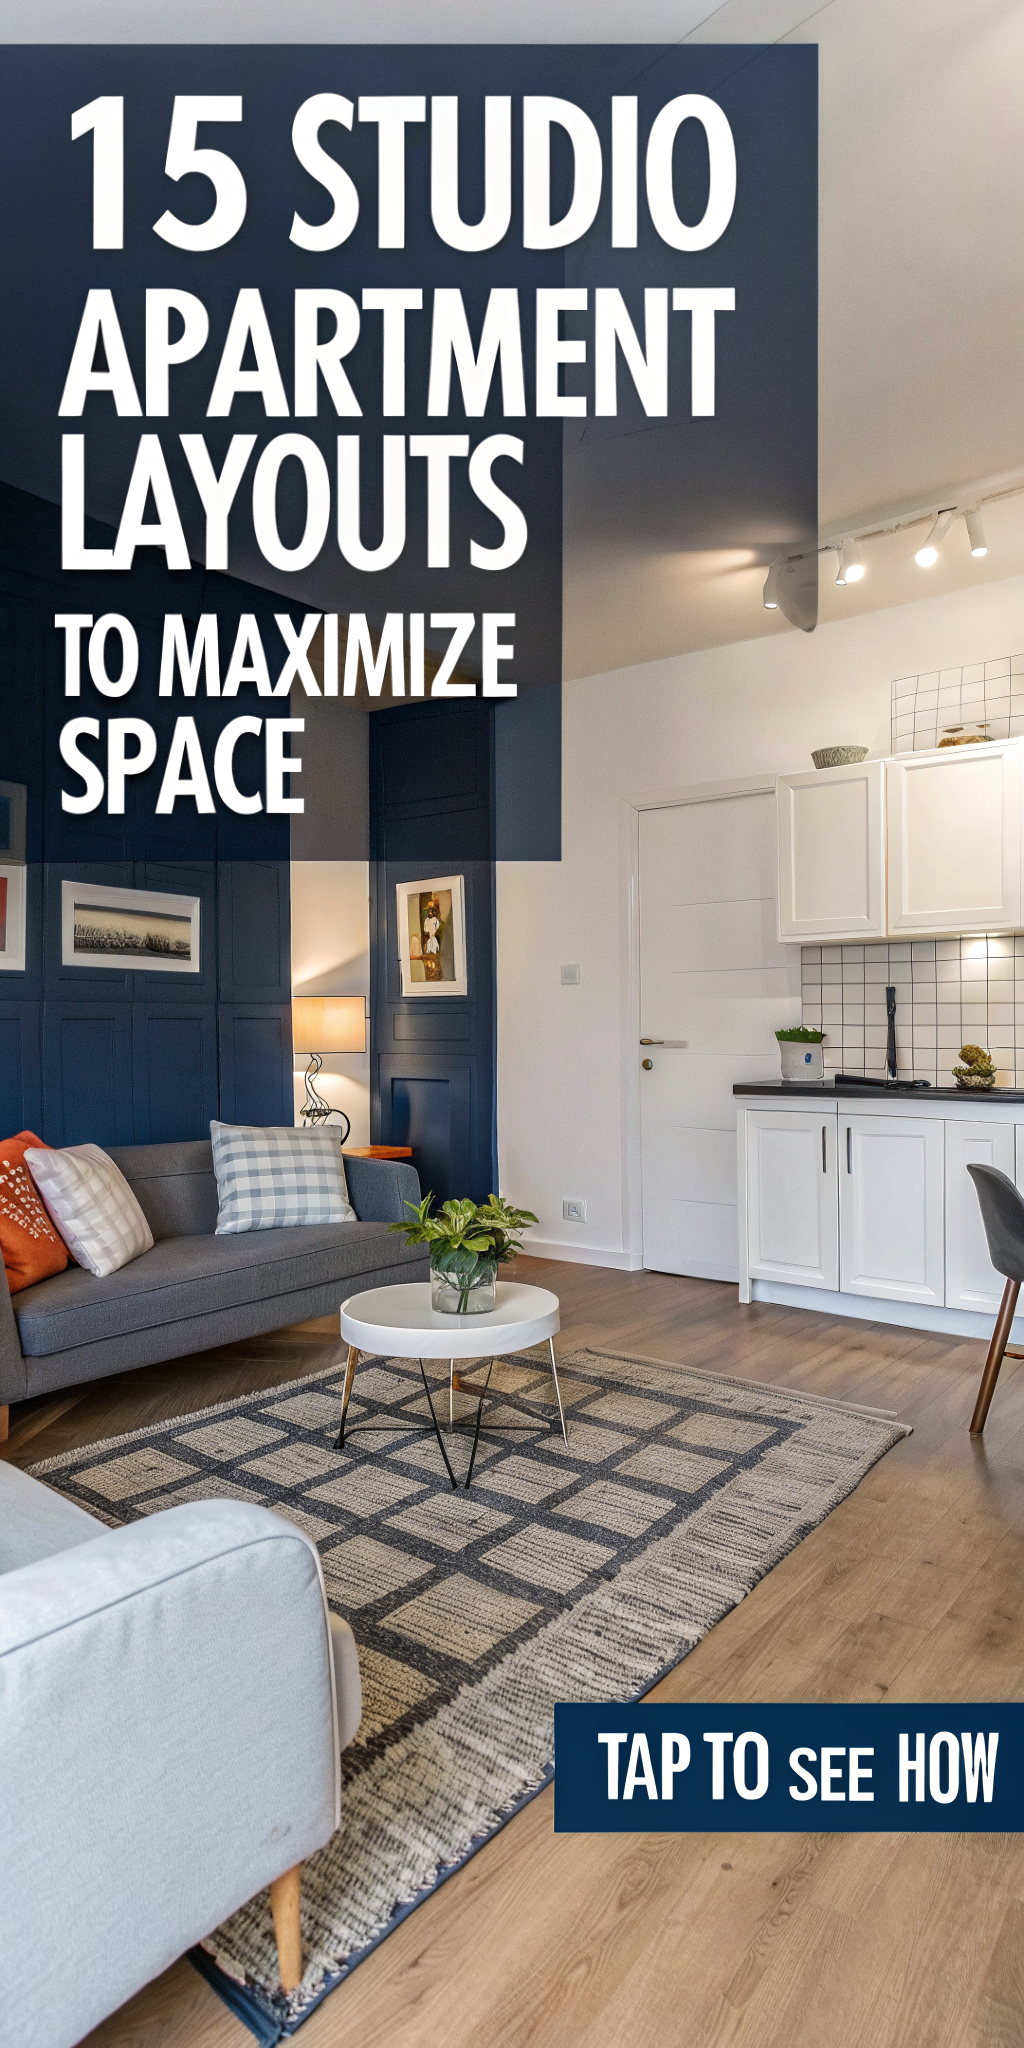
Living in a studio doesn’t mean sacrificing style or function. These genius layouts prove you can have distinct zones, plenty of storage, and a space that actually feels bigger than it is—all without knocking down a single wall.
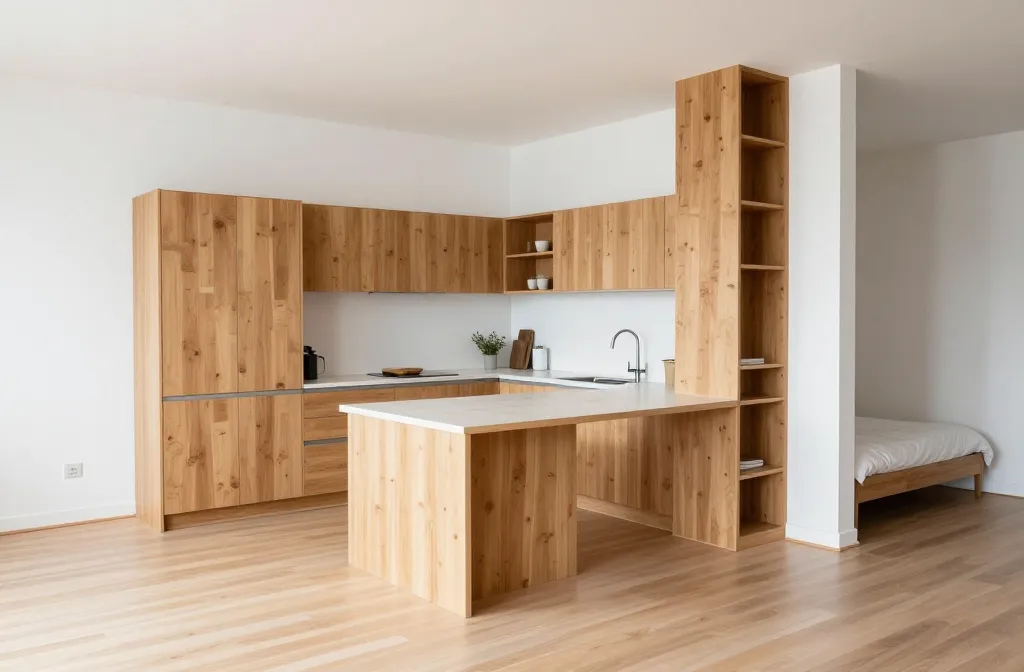
1. The L-Shaped Kitchen Divider With Hidden Storage
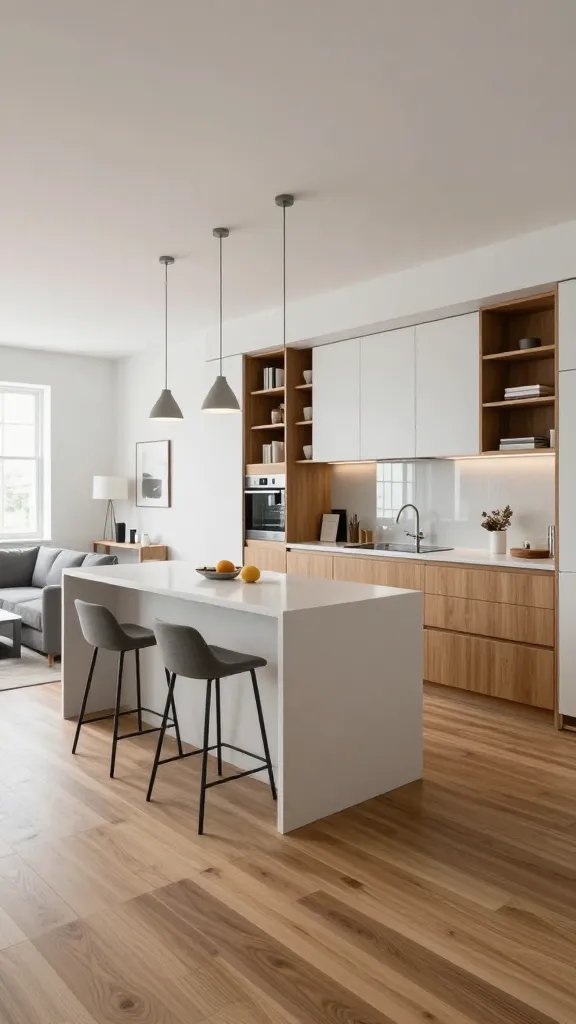
Use your kitchen as the hero by extending it into an L-shaped peninsula that naturally separates your sleeping area from the living space. The magic happens underneath—every inch of that peninsula becomes storage heaven.
Install floor-to-ceiling cabinets on the kitchen side and open shelving on the living room side for books and décor. The peninsula overhang doubles as a breakfast bar with backless stools that tuck completely underneath when not in use. Add a slim console table behind your sofa to create even more definition between zones.
Key Elements:
- Extended kitchen peninsula with waterfall edge
- Two-toned cabinetry (kitchen side vs. living side)
- Pendant lights that hang low to mark the boundary
- Rolling storage cart that slides into gaps
This layout works brilliantly if you love to cook and entertain. Your kitchen becomes the centerpiece instead of an afterthought shoved in the corner.
2. The Murphy Bed Wall Unit With Desk Combo
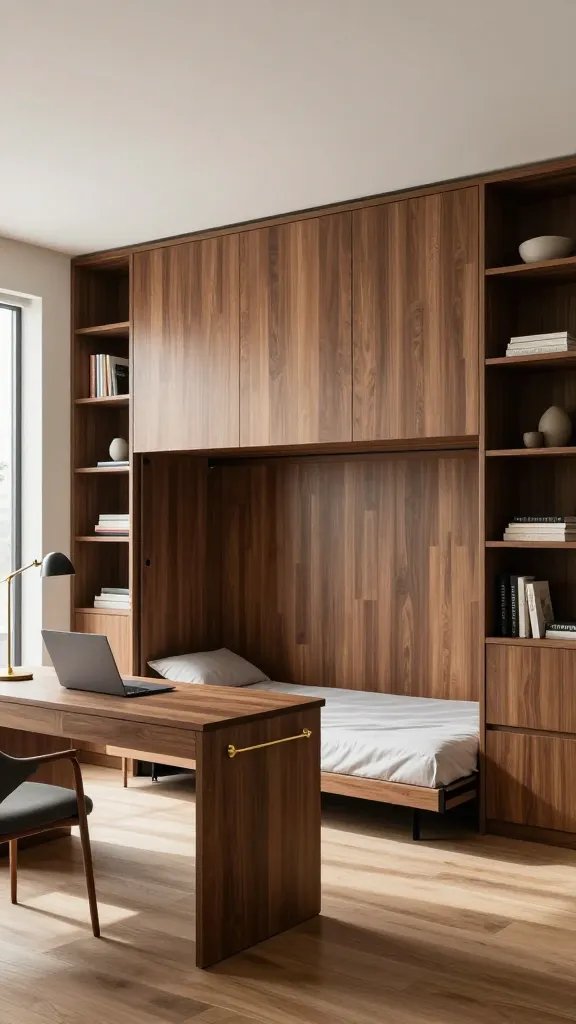
During the day, your studio is a spacious living room and home office. At night, you pull down a queen-size Murphy bed that’s seamlessly integrated into a gorgeous wall unit. Seriously, modern Murphy beds don’t look like your grandma’s version anymore.
Flank the bed with built-in shelving units and include a fold-down desk on one side. When the bed is up, the desk becomes your full-time workspace with everything you need within arm’s reach. Choose a wall unit in warm walnut or matte white depending on your vibe.
Add a statement rug to define your living area and keep a lightweight ottoman with storage that can move wherever you need extra seating. This setup is perfect for remote workers who refuse to choose between a proper bedroom and a functional office.
3. The Elevated Platform Bed With Storage Underneath
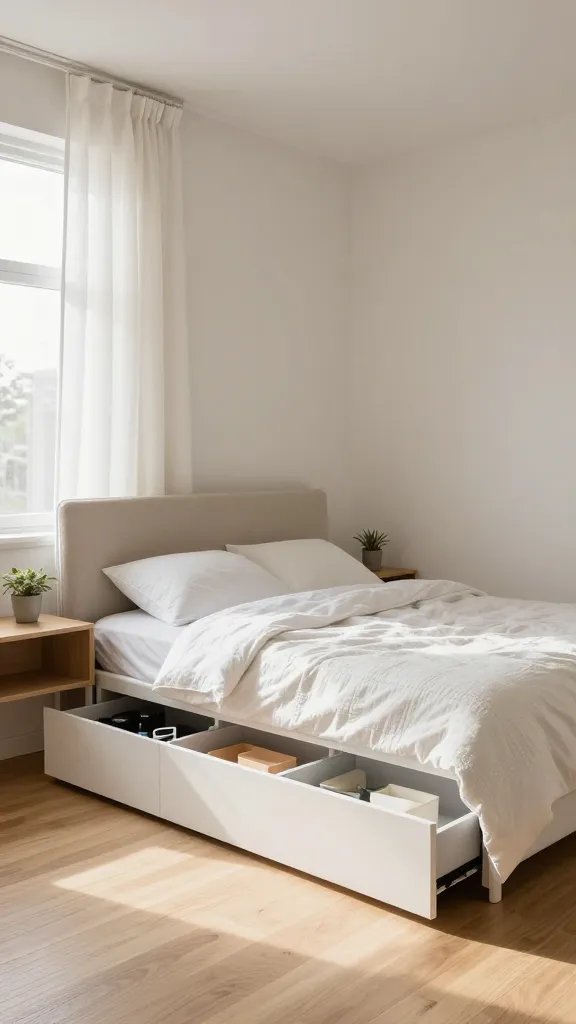
Build or buy a raised platform that elevates your bed about 18-24 inches off the ground. The entire space underneath transforms into massive storage for out-of-season clothes, luggage, or anything you don’t need daily access to.
Use rolling storage bins or built-in drawers that pull out from the platform’s front edge. Frame the platform with a low-profile headboard and flank it with floating nightstands to keep the look sleek. Drape linen curtains from a ceiling track if you want the option to completely hide the bed area.
Styling the Platform:
- Add LED strip lighting underneath for a floating effect
- Choose low-profile bedding so the bed doesn’t feel too high
- Install a reading light on the wall above instead of table lamps
- Use the platform edge as a bench for putting on shoes
This works especially well in studios with high ceilings where vertical space goes to waste. Plus, climbing into bed feels kind of special every single night.
4. The Room Divider Bookshelf That Works Both Sides
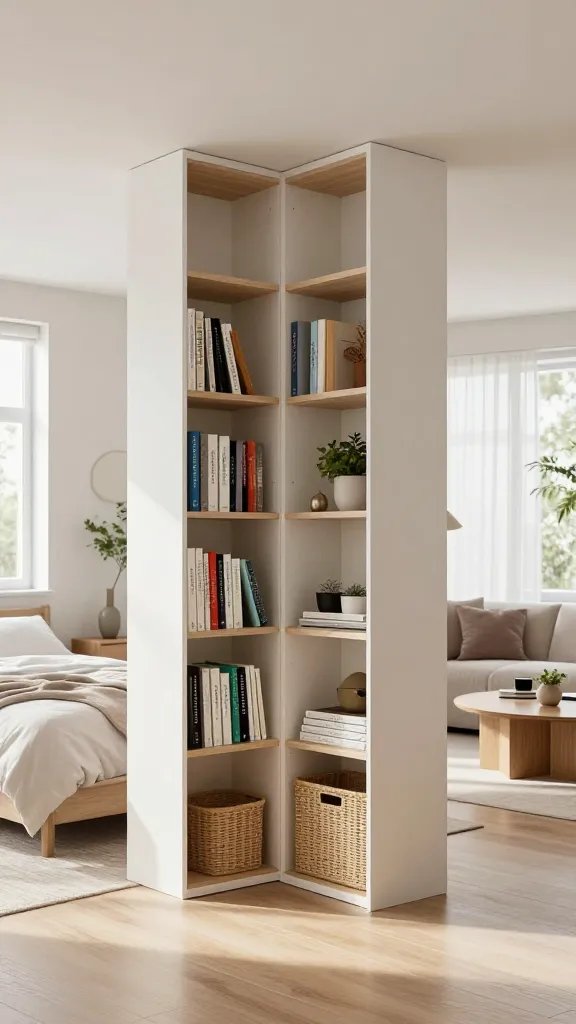
A double-sided bookshelf (think IKEA Kallax but make it chicer) creates an instant wall between your bed and living area without blocking light or making the space feel closed-off. The genius part? Both sides are functional.
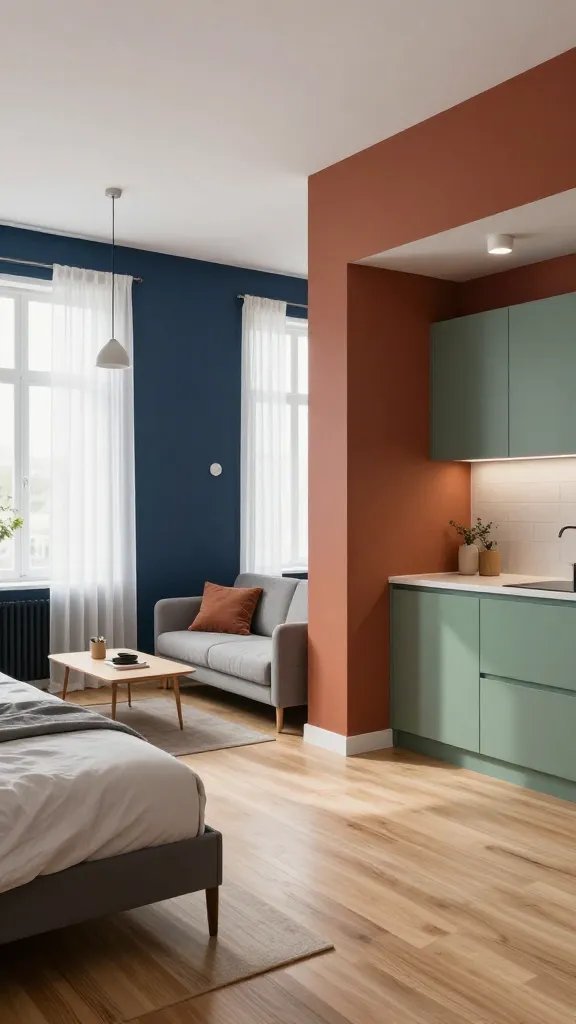
Face books and decorative objects toward the living room side, while the bedroom side holds storage baskets for clothes, extra blankets, and personal items. Keep the top shelf at eye level empty so you maintain sightlines across the studio. Paint the back panel of the shelving unit in a bold accent color like terracotta or sage green for visual interest.
Place your sofa perpendicular to the bookshelf to anchor the living zone, and position your bed parallel on the other side. Add a floor lamp on each side of the divider to ensure both zones have proper lighting.
5. The Closet-Turned-Sleeping-Nook Layout
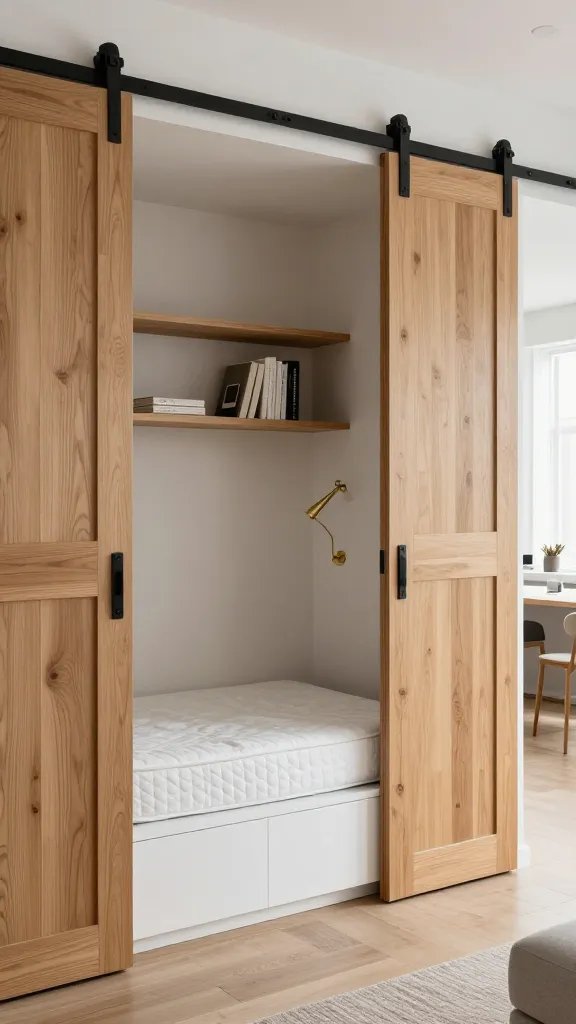
If your studio has a decent-sized closet, gut it completely and turn it into a built-in sleeping nook. This frees up your entire main room to function as a proper living space, dining area, and office.
Install a custom platform that fits a full or queen mattress perfectly inside the closet space. Add floating shelves above for books and a phone charger, plus reading sconces on either side. Hang a heavy curtain or install sliding barn doors so you can close off the sleeping area completely when you have guests.
Making It Cozy:
- Paint the nook interior a moody color like charcoal or navy
- Add fairy lights or a small pendant for ambiance
- Include a small wall-mounted fan for air circulation
- Use a low-profile mattress so you don’t hit your head
Trust me, this setup makes your studio feel like a one-bedroom without the rent increase. Your sleeping area becomes its own private sanctuary.
6. The Galley Kitchen With Rolling Island Buffer

Work with your galley kitchen by adding a narrow rolling island that serves as a prep station, dining table, and room divider all at once. Choose one that’s no wider than 24 inches so it doesn’t crowd the space.
Position the island perpendicular to your kitchen to create a natural barrier between cooking and living zones. Use it for meal prep when you’re cooking, then roll it out as a dining table with a couple of folding chairs stored nearby. Add butcher block top for warmth and install hooks on the sides for hanging utensils or dish towels.
On the living room side, arrange your furniture to face away from the kitchen—sofa against the island-side, TV on the opposite wall. This layout flows naturally and makes cooking feel less like you’re doing it in your bedroom.
7. The Corner Bed With Wraparound Storage Headboard
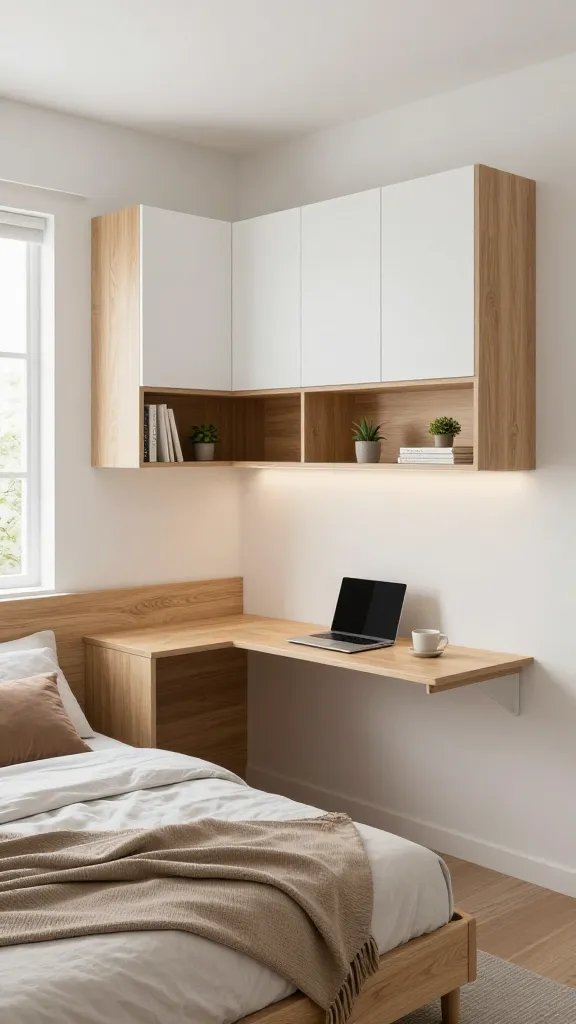
Tuck your bed into a corner and build out a custom L-shaped headboard with built-in storage, shelving, and even a small desk extension. This creates a bedroom “zone” using just two walls while maximizing every inch of vertical space.
The headboard should extend at least 12 inches above the mattress and wrap around both walls that touch the corner. Include shallow shelves for books, closed cabinets for less pretty storage, and a fold-down desk surface that extends from the longer wall section. Paint it all in a contrasting color to make it an architectural feature.
Layer in textured bedding, hang a statement light fixture above (a pendant or sconce), and add floating nightstands on the open sides. The rest of your studio stays completely open for living, dining, and entertaining.
8. The Lofted Bed Over Home Office Setup
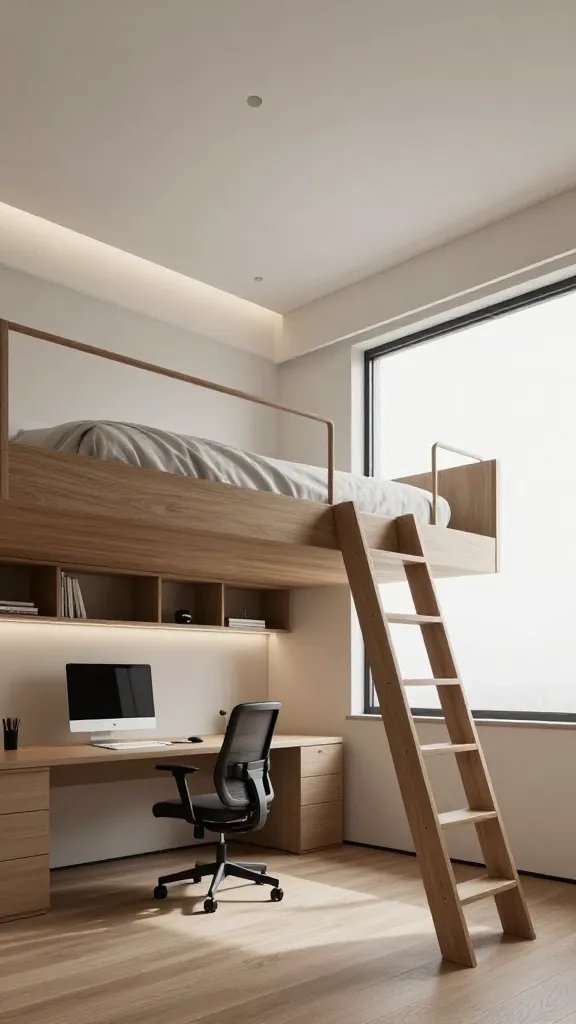
Got ceilings over 10 feet? Build a lofted sleeping area and claim the entire space underneath for a proper home office. This is next-level space maximization that actually looks intentional, not dorm-room desperate.
Invest in a sturdy loft structure (not flimsy) that positions your mattress about 6 feet up, leaving enough headroom beneath for a full desk setup, office chair, and shelving. Add a secure ladder or small staircase with built-in storage in each step. Install recessed lighting under the loft platform so your workspace isn’t dungeon-dark.
Loft Essentials:
- Guard rail on open sides (safety first!)
- Clip-on reading light for the bed area
- Lightweight bedding that’s easy to change
- Small shelf or ledge near the pillow for phone and water
This layout is perfect for young professionals or grad students who need a dedicated workspace. Just make sure you don’t mind climbing into bed every night.
9. The Diagonal Furniture Placement With Flow Paths
Instead of pushing everything against the walls, angle your main furniture pieces diagonally to create distinct zones and natural walking paths. It sounds counterintuitive, but it actually makes small spaces feel larger and more dynamic.
Position your sofa at a 45-degree angle from the corner, which naturally creates a living room zone in front and leaves space behind for your bed area. Place your bed diagonally in the opposite corner. The angled placement creates triangular pathways that guide movement through the studio without feeling cramped.
Add a round coffee table (easier to navigate around), a tall plant in dead corners to soften angles, and use area rugs under each furniture grouping to reinforce the separate zones. This layout works best in square or nearly-square studios.
10. The Curtain Divider With Ceiling Track System
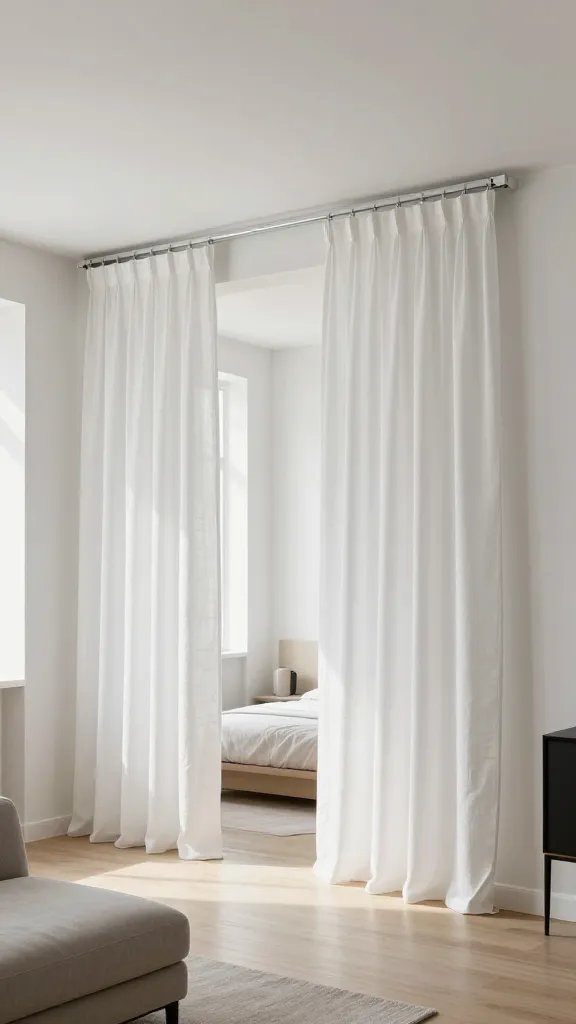
Install a ceiling-mounted curtain track that runs in a U-shape or L-shape to completely enclose your sleeping area when needed. Choose floor-to-ceiling drapes in a light, flowy fabric that won’t make the space feel heavy.
When open, the curtains stack neatly against the walls and your studio feels completely open. Pull them closed at night or when guests visit, and suddenly you have a private bedroom. Go with white linen, soft gray, or even a blush pink for a romantic vibe.
Track Layout Options:
- L-shape: Encloses bed against one wall and side
- U-shape: Creates a three-sided bedroom alcove
- Straight line: Simple division down the middle of the studio
- Curved track: For organic, flowing boundaries
This is the most flexible layout option since you can literally change your floor plan every day. Plus, it’s renter-friendly if you use a tension system instead of drilling into the ceiling.
11. The Multi-Functional Furniture Only Layout
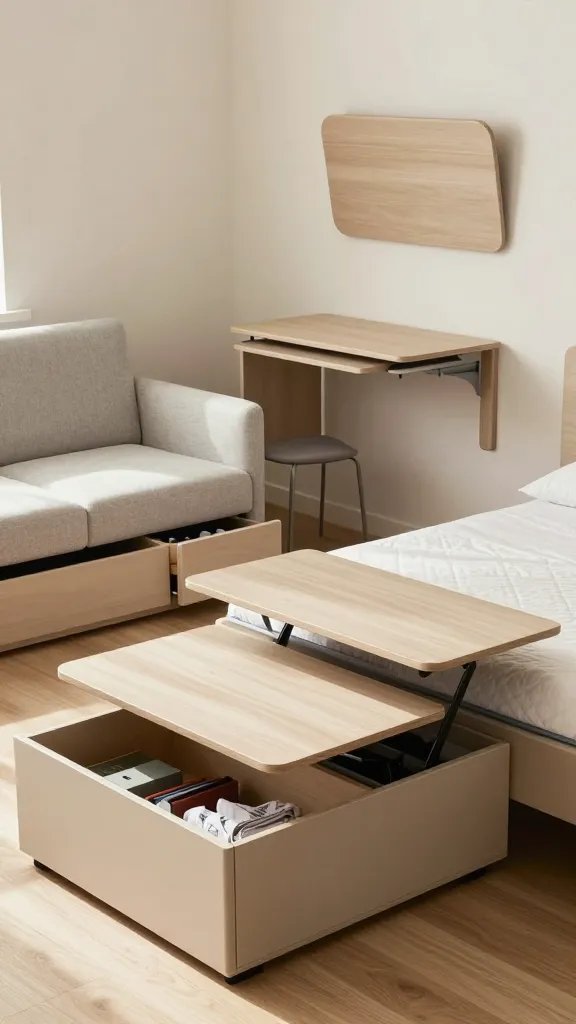
Every single piece of furniture in this layout serves at least two purposes—there are zero single-function items allowed. Your ottoman has storage inside. Your coffee table lifts to dining height. Your sofa pulls out into a bed for guests.
Invest in a wall-mounted drop-leaf table that folds flat when not in use, nesting tables that stack away, and a storage bench at the foot of your bed that holds extra linens. Choose a console table behind your sofa with drawers for office supplies so it doubles as a work-from-home desk.
Keep your actual bed as a permanent fixture (sleeping on a sofa bed every night gets old fast, FYI), but make everything around it adaptable. The result? A studio that morphs to fit whatever you’re doing at any moment without feeling cluttered with furniture.
12. The Open Wardrobe Divider With Clothing Display
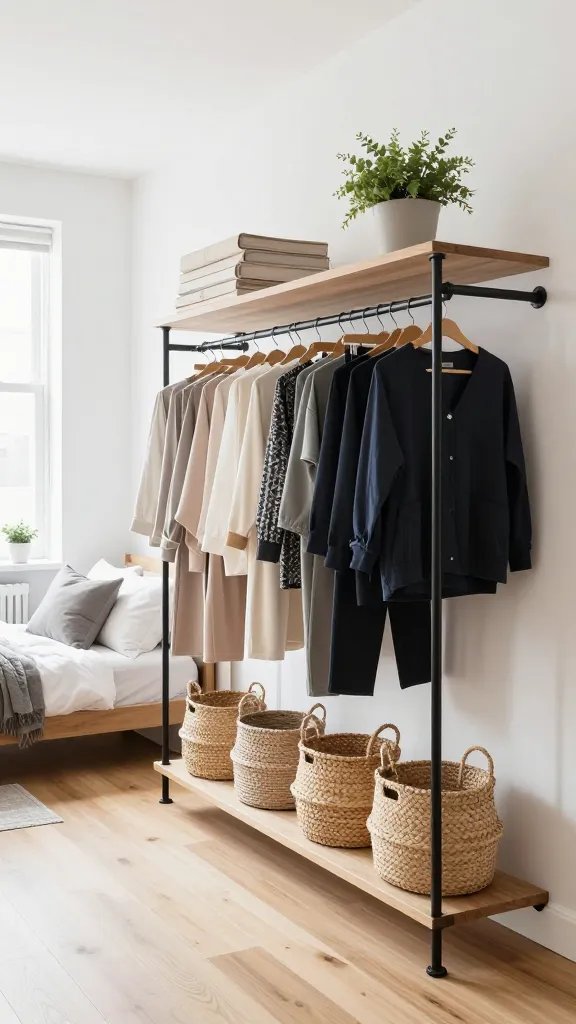
Turn your clothing storage into a beautiful room divider with an open wardrobe system that displays your curated closet like a boutique. This only works if you’re neat and intentional about what you own, but the effect is stunning.
Use a freestanding clothing rack system with multiple levels (think industrial pipe or sleek metal frames) positioned perpendicular to the wall. Organize clothes by color for maximum visual impact. Add storage boxes or woven baskets on lower shelves for items you don’t want on display.
Position this wardrobe divider to separate your bed from the living area, making sure the “back” side (facing your bed) is just as attractive as the front. Add a full-length mirror at one end and maybe a small dresser nearby for folded items. This layout is perfect for fashion lovers who want their wardrobe to be part of the décor.
13. The Studio With Faux Entryway Zone
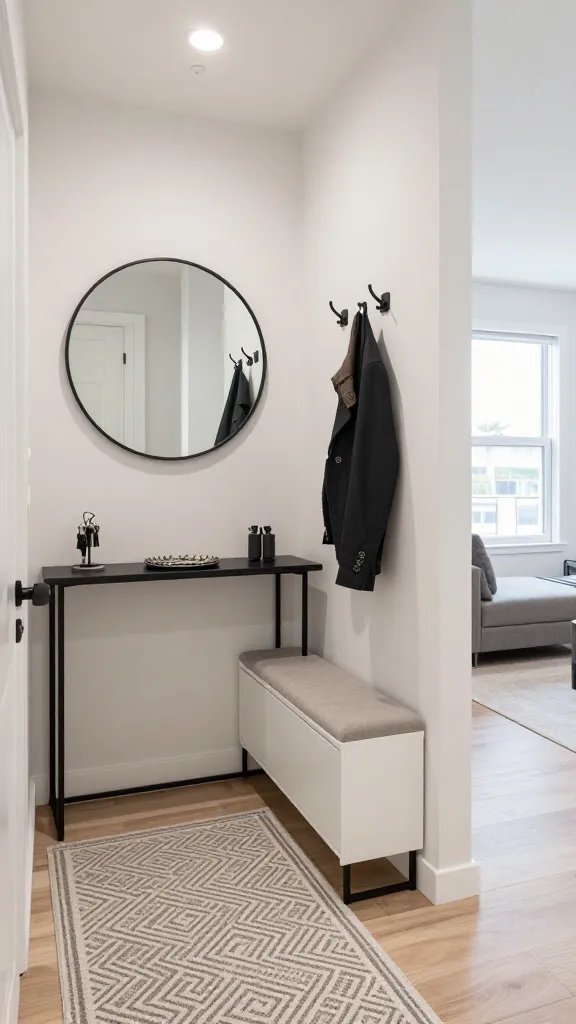
Create the illusion of a proper entryway by dedicating the first 6-8 feet of your studio to entry functions only. This makes the space feel larger and more apartment-like instead of walking straight into your living room/bedroom.
Install a slim console table immediately inside the door with a mirror above it and a small tray for keys. Add a coat rack or wall hooks, and place a narrow shoe cabinet or bench with storage nearby. Use a runner rug to define this zone visually.
Entryway Essentials:
- Console table no deeper than 10-12 inches
- Statement mirror to bounce light
- Hooks for bags, coats, and dog leashes
- Umbrella stand or basket
Beyond the entry zone, arrange your actual living and sleeping areas. This psychological separation makes your studio feel more like a real apartment and gives guests somewhere to pause before entering your personal space.
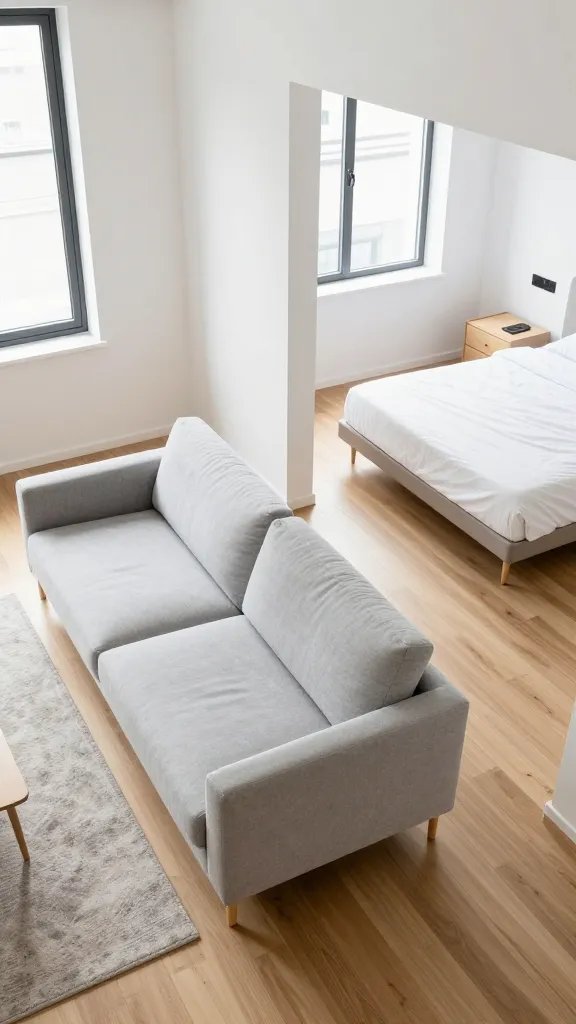
14. The Bed-Behind-Sofa European Style Layout
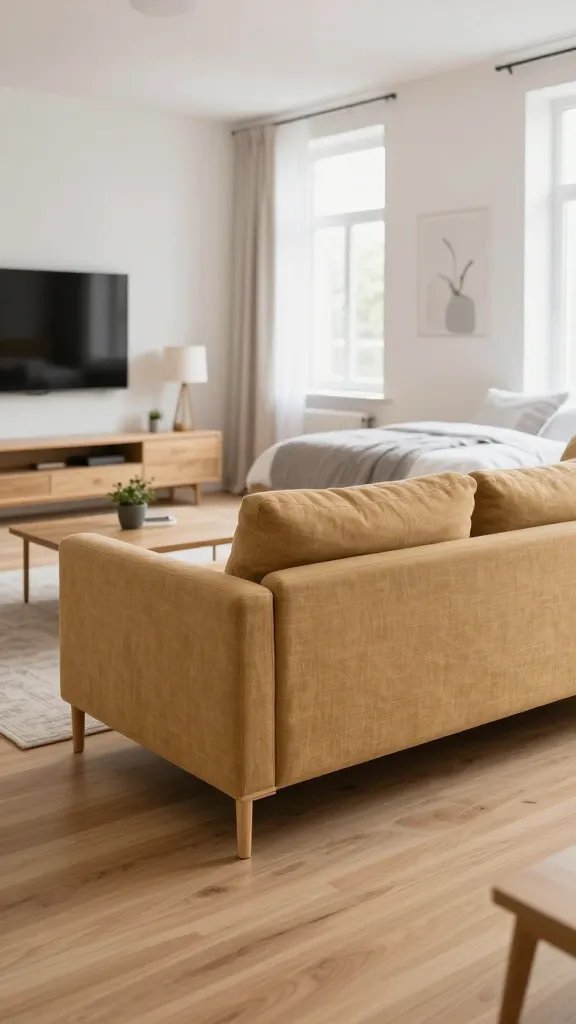
Position your sofa in the middle of the room (not against a wall!) with your bed directly behind it, headboard-to-sofa-back. This is how tiny European apartments have maximized space for decades, and it’s genius.
The key is keeping the sofa back at exactly the right height—ideally matching or slightly lower than your mattress height. Add a narrow console table between the sofa and bed (6-8 inches wide) to create physical separation and add surface space for lamps or décor.
Your living room faces one direction with the TV, coffee table, and seating area. Your bedroom faces the other direction toward a window or wall where you can hang art. Use matching bedside tables and create a cohesive color scheme so the whole studio feels intentional. This layout maximizes square footage better than almost any other option.
15. The Zoned Studio With Color Blocking Strategy