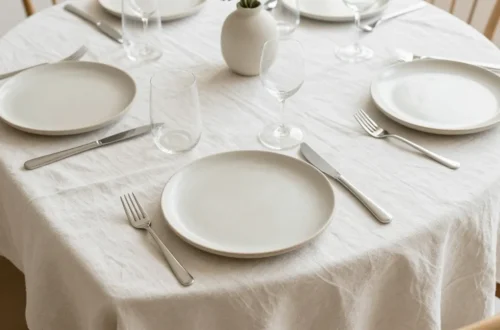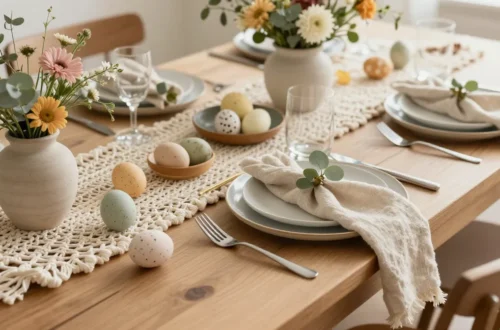
Ditch the store-bought blah this Easter! We’re talking about transforming your home into a springtime wonderland with crafts that are as fun to make as they are adorable to display. Get ready to impress everyone without breaking the bank – these 15 ideas are pure magic.
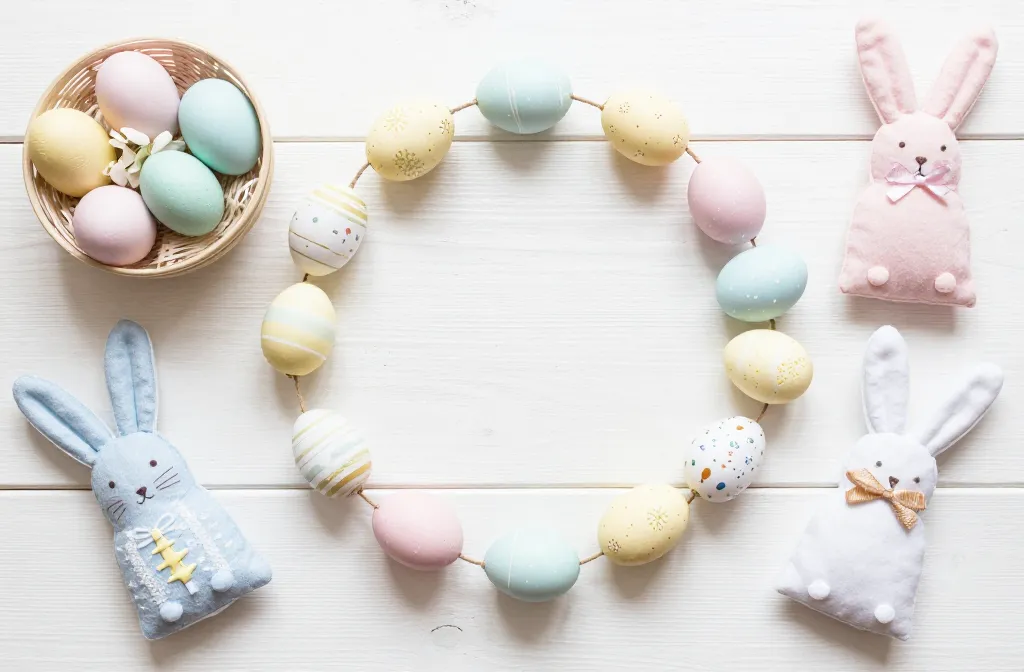
1. Craft a Whimsical Egg Garland That Wows!
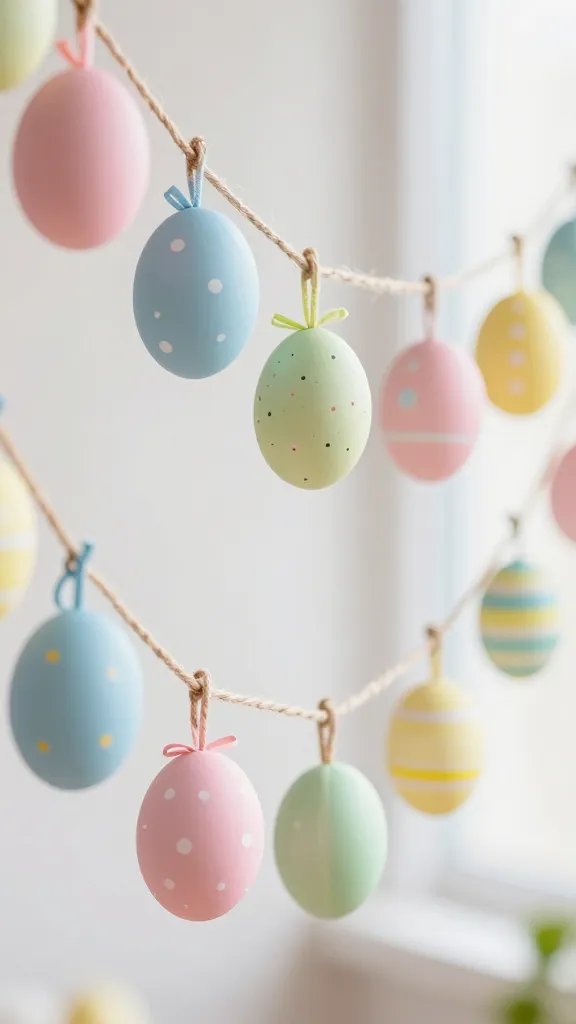
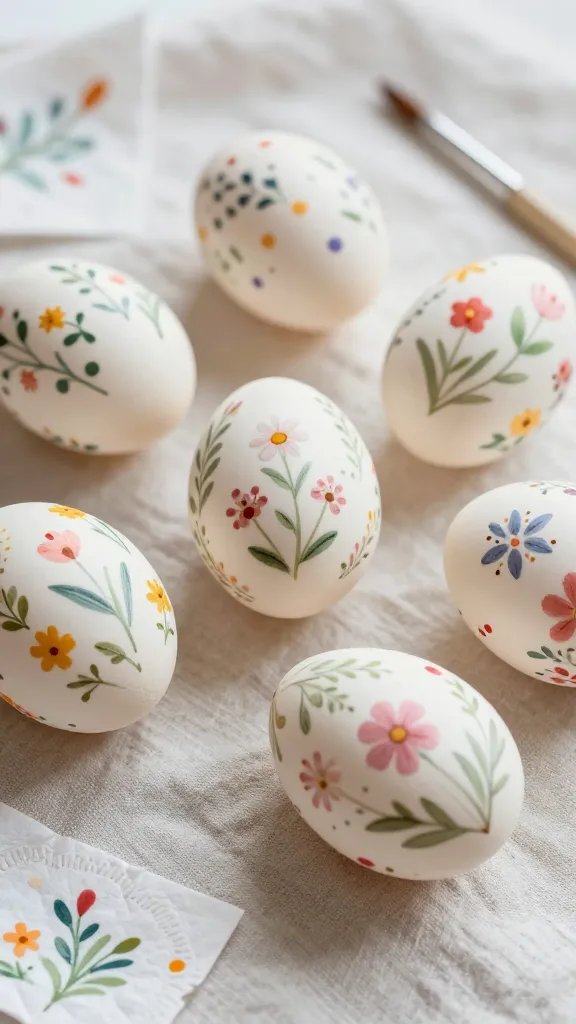
Who says Easter eggs are just for baskets? Elevate your décor game with a stunning egg garland that adds a touch of whimsical charm to any space. This project is incredibly versatile, letting you play with colors and patterns to match your existing aesthetic.
What You’ll Need:
- Blown-out or craft eggs (plastic or papier-mâché work great!)
- Acrylic paints in spring colors
- Paintbrushes and fine-tip markers
- String or twine
- Large needle or hot glue gun
Start by painting your eggs in various pastel shades, stripes, or polka dots. Once dry, use a large needle to thread them onto your twine, or simply hot glue them to the string at even intervals. Seriously, this garland instantly brightens up a mantel or doorway!
This simple yet impactful decoration is perfect for adding a festive touch above a window, across a fireplace, or even draped around a centerpiece.
2. Design an Upcycled Bunny Banner That’s Hoppy Chic

Got some old fabric scraps or pretty paper lying around? Turn them into an adorable bunny banner that screams “Happy Easter!” This craft is not only eco-friendly but also gives your décor a personalized, handmade touch that store-bought items just can’t beat.
Materials You’ll Need:
- Fabric scraps or cardstock in various spring patterns/colors
- Bunny template (easy to find online or freehand)
- Scissors
- Twine or ribbon
- Small pom-poms (for tails)
- Fabric glue or hot glue gun
Trace and cut out bunny shapes from your chosen materials. Don’t be afraid to mix and match patterns for a truly eclectic look! Glue a tiny pom-pom onto each bunny for a fluffy tail. Then, simply attach your bunnies to the twine or ribbon, spacing them out evenly. FYI, this looks amazing hanging on a wall or across a bookshelf.
This banner is a fantastic way to add a playful, welcoming vibe to your entryway or a child’s room, making everyone smile the moment they see it.
3. Cultivate an Adorable Carrot Patch Centerpiece

Bring the garden indoors with a charming carrot patch centerpiece that’s surprisingly easy to make and utterly delightful. It’s a whimsical nod to the Easter bunny’s favorite snack and makes for a fantastic conversation starter at your holiday brunch.
Gather Your Supplies:
- Small terra cotta pots (various sizes)
- Green felt or construction paper
- Orange felt or construction paper
- Cotton batting or brown crinkled paper (for “soil”)
- Hot glue gun
- Scissors
Cut out carrot shapes from orange felt, then roll and glue them into cones. Cut green strips for the carrot tops and glue them inside the wider end of your orange cones. Fill your terra cotta pots with cotton batting or crinkled paper to act as soil, then “plant” your felt carrots. Arrange them creatively for a rustic, charming display.
This centerpiece adds a touch of rustic charm and playful elegance to your dining table or kitchen island, perfect for a spring gathering.
4. Weave a Blooming Paper Flower Wreath
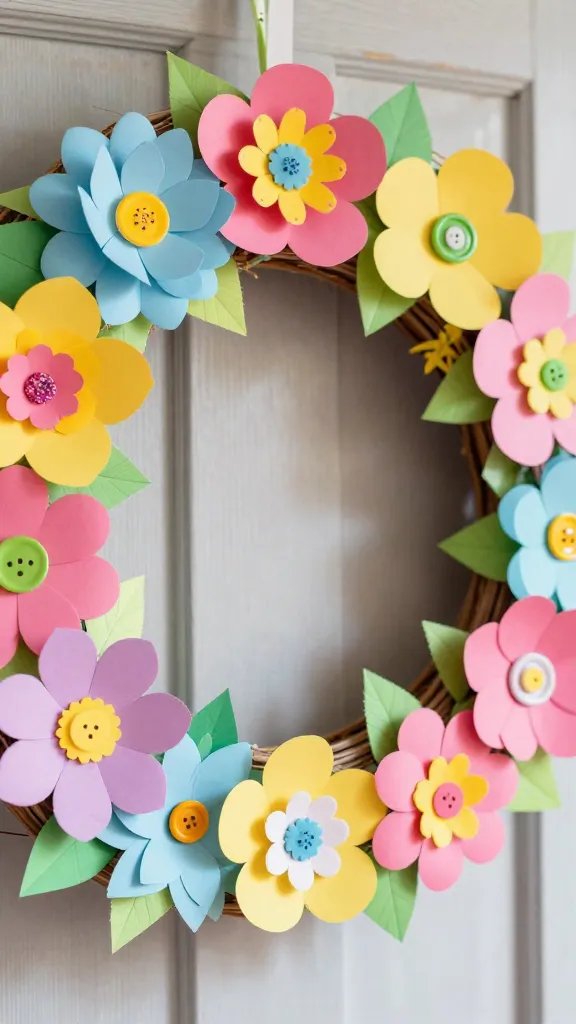
Who needs real flowers when you can craft a stunning paper flower wreath that lasts all season long? This project allows for endless creativity with colors and flower styles, resulting in a vibrant, long-lasting decoration that brightens any door.
What You’ll Need:
- Cardstock or scrapbook paper in various spring colors
- Wreath form (grapevine, foam, or cardboard ring)
- Scissors
- Hot glue gun
- Optional: buttons, glitter, small beads for flower centers
Cut out various flower shapes and sizes from your paper. You can layer petals for a fuller look or even try rolling paper strips into rosettes. Once you have a good collection of flowers, start hot gluing them onto your wreath form, overlapping and mixing colors for a lush appearance. Don’t forget to add leaves or small accents!
Hang this beautiful wreath on your front door to welcome guests, or use it as a cheerful wall decoration inside your home.
5. Create Fluffy Chick Pom-Poms That Are Too Cute!

These little bundles of joy are so easy to make, you’ll want a whole flock! Fluffy chick pom-poms bring an undeniable cuteness factor to your Easter décor, perfect for scattering around or adding to a centerpiece.
Supplies for Your Flock:
- Yellow yarn
- Cardboard or pom-pom maker
- Scissors
- Googly eyes
- Orange or yellow felt (for beaks and feet)
- Craft glue
Make pom-poms using your yellow yarn – you can wrap yarn around two cardboard rings or use a dedicated pom-pom maker. Once trimmed, glue on googly eyes and cut tiny triangles from felt for beaks, attaching them with craft glue. For feet, cut small webbed shapes from felt and glue them to the bottom. Seriously, they’re adorable!
These little chicks are perfect for nestling in an Easter basket, decorating a shelf, or adding a playful touch to your table settings.
6. Transform Egg Cartons into Spring Blooms
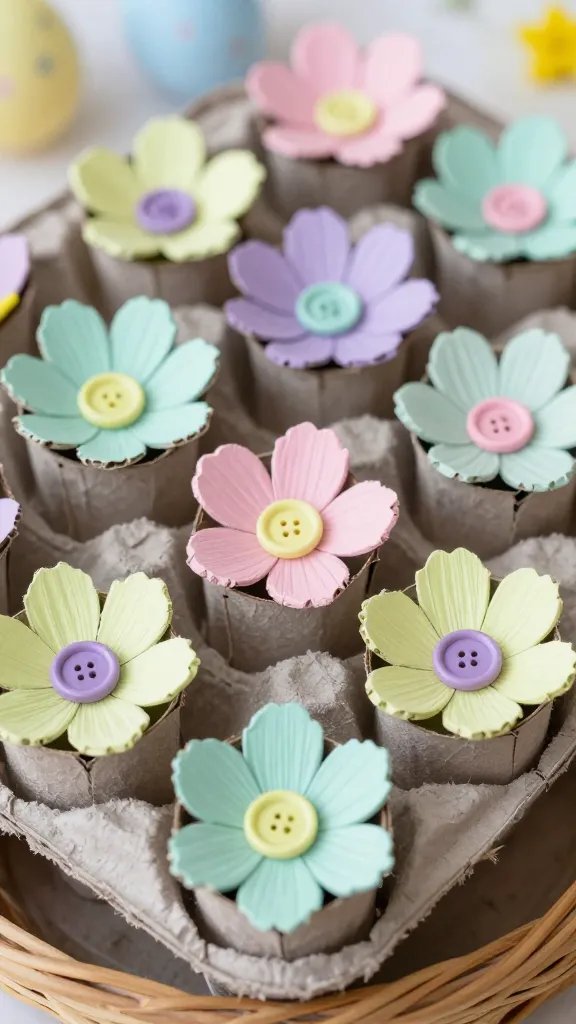
Who knew humble egg cartons could be transformed into such charming spring flowers? This budget-friendly craft is fantastic for adding a rustic, textured floral element to your Easter decorations. It’s an excellent way to repurpose and create something beautiful!
You’ll Need These:
- Empty cardboard egg cartons
- Scissors
- Acrylic paints (pastels, greens)
- Paintbrushes
- Buttons or beads (for flower centers)
- Hot glue gun
Cut out individual cups from the egg carton, then trim and shape the edges to resemble flower petals. Paint them in soft spring colors – think pinks, blues, yellows, and purples. Once dry, glue a button or bead into the center of each flower. You can then glue these flowers onto a branch, a wreath, or even string them into a garland. IMO, they look surprisingly chic!
These unique blossoms are perfect for creating a one-of-a-kind garland, embellishing a gift, or adding a handmade touch to a centerpiece.
7. Craft Charming Bunny Ear Napkin Rings or Vase Wraps

Give your Easter table a delightful touch with these easy-to-make bunny ear napkin rings or vase wraps. They’re subtle, sweet, and instantly elevate your place settings or floral arrangements with a playful nod to the Easter bunny.
Gather Your Materials:
- Felt sheets (white, pink, light blue)
- Scissors
- Hot glue gun
- Empty toilet paper rolls (for napkin rings) or ribbon (for vase wraps)
Cut out bunny ear shapes from white felt, then cut smaller, slightly narrower inner ear shapes from pink felt. Glue the pink inner ears onto the white ears. If making napkin rings, cut a toilet paper roll into a ring, then glue the ears to the top. For vase wraps, simply glue the ears to a strip of ribbon that can be tied around your vase. Trust me, it’s super cute!
These charming accents are ideal for adding a personal, festive touch to your Easter brunch table or for sprucing up any simple vase of flowers.
8. Weave Rustic Twig & Moss Nests for a Natural Touch
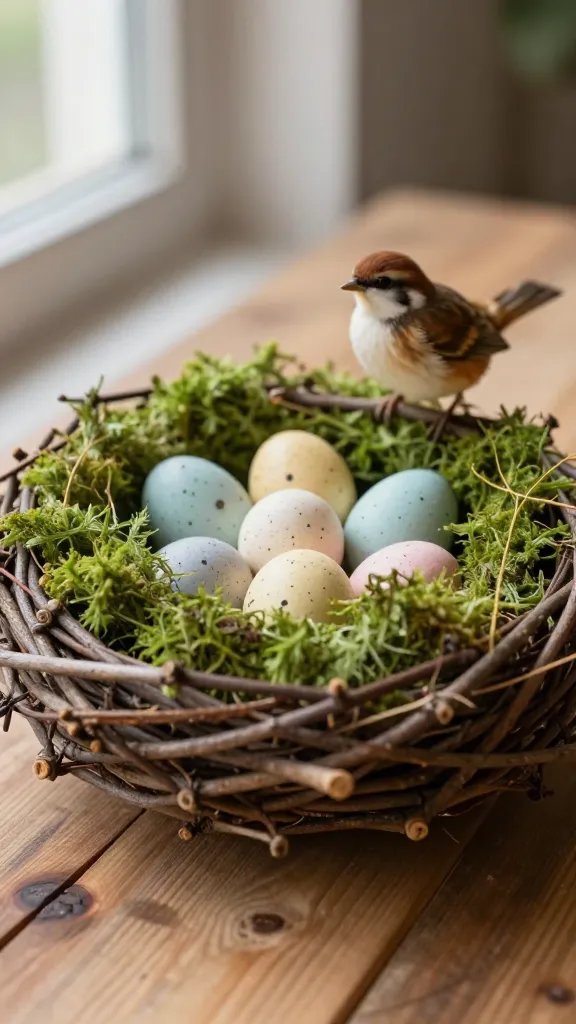
Bring the beauty of nature indoors with these adorable rustic twig and moss nests. They’re perfect for holding decorative eggs or small treats, adding an organic, earthy feel to your Easter décor that feels straight out of a storybook.
Supplies You’ll Need:
- Small flexible twigs (collected from your yard or craft store)
- Spanish moss or craft moss
- Hot glue gun
- Small decorative eggs (plastic or painted)
- Optional: small artificial birds
Form your twigs into a small, circular nest shape, using hot glue to secure them as you go. Don’t worry about perfection; rustic is the goal! Once the twig base is stable, line the inside and outside with Spanish moss, securing it with dabs of hot glue. Fill your finished nests with decorative eggs and maybe a tiny artificial bird. They look so authentic!
These natural nests are wonderful for scattering on a mantel, placing on a bookshelf, or using as individual place settings with a single egg inside.
9. Create Elegant Decoupage Eggs with Napkin Magic
Forget plain dyed eggs! Decoupage eggs using pretty paper napkins are an elegant and surprisingly simple way to create stunning, intricate designs. The results look incredibly professional and expensive, but your secret is safe with me!
Materials for Decoupage:
- Blown-out eggs or craft eggs (wooden, plastic)
- Decorative paper napkins (with small patterns)
- Mod Podge (matte or gloss)
- Small paintbrush
- Scissors
Separate the printed layer from your decorative napkin (most have 2-3 layers). Cut or tear small pieces of the patterned napkin. Apply a thin layer of Mod Podge to a section of your egg, carefully lay a napkin piece on top, then brush another thin layer of Mod Podge over it, smoothing out any wrinkles. Continue until the egg is covered. Let dry completely. Seriously, the effect is gorgeous!
These beautiful eggs make fantastic display pieces in a bowl, on a tiered tray, or as unique gifts for friends and family.
10. Wrap Cozy Yarn-Wrapped Eggs for Texture

Add a cozy, tactile element to your Easter display with yarn-wrapped eggs. This craft is wonderfully meditative and allows you to experiment with different yarn colors and textures, creating a soft, inviting look.
What You’ll Need:
- Blown-out or craft eggs
- Various colors of yarn (chunky, thin, fuzzy – anything goes!)
- Craft glue or hot glue gun
- Scissors
- Optional: glitter, small beads
Start by applying a small dot of glue to the narrow end of an egg, then press the end of your yarn into it. Begin wrapping the yarn tightly around the egg, adding small dots of glue every few wraps to secure it. Continue until the entire egg is covered, then snip the yarn and glue down the end. Mix and match colors or create stripes! They feel so nice to touch.
These textured eggs are perfect for filling baskets, creating a unique centerpiece, or adding a soft touch to a decorative bowl.
11. Bake Sweet Salt Dough Ornaments for Keepsakes
Salt dough isn’t just for Christmas! Craft adorable Easter-themed ornaments like bunnies, eggs, and chicks that can be painted and kept for years. This is a fantastic activity for kids and results in charming, durable decorations.
Ingredients & Tools:
- 1 cup flour
- 1/2 cup salt
- 1/2 cup water
- Cookie cutters (bunny, egg, chick shapes)
- Drinking straw (for making holes)
- Baking sheet and parchment paper
- Acrylic paints, paintbrushes, ribbon
Mix flour, salt, and water to form a dough. Roll it out to about 1/4 inch thick and cut out shapes with cookie cutters. Use a straw to make a hole at the top of each ornament for hanging. Bake at 250°F (120°C) for 2-3 hours until hard. Once cooled, paint them in bright spring colors and thread with ribbon. They’re little treasures!
Hang these sweet ornaments on an Easter tree, use them as gift tags, or display them as charming keepsakes year after year.
12. Illuminate with Glimmering Mason Jar Luminaries

Create a magical glow with mason jar luminaries featuring festive Easter silhouettes. These are perfect for setting a cozy mood on your porch, patio, or indoors, casting beautiful shadows as dusk approaches.
What You’ll Need:
- Mason jars (various sizes)
- Black construction paper or vinyl
- Bunny, egg, or chick silhouette templates
- Scissors or craft knife
- Mod Podge or spray adhesive
- Battery-operated tea lights or fairy lights
Print out your chosen silhouettes and cut them out from black paper or vinyl. Clean your mason jars thoroughly. Apply Mod Podge or spray adhesive to the back of your silhouettes and carefully press them onto the outside of the mason jars. Once dry, place a battery-operated tea light or string of fairy lights inside. Boom! Instant ambiance.
These enchanting luminaries are ideal for creating a warm, inviting glow on your porch, lining a pathway, or as a charming centerpiece.
13. Stitch a Festive Fabric Scrap Bunting for Instant Cheer
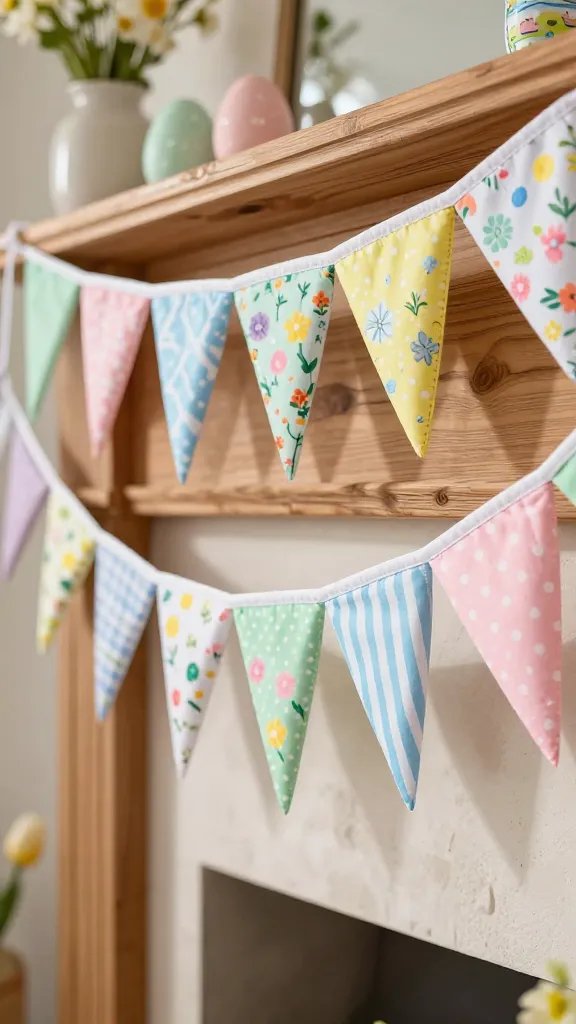
Got a stash of fabric scraps you’ve been saving for “someday”? Someday is today! Turn those bits and bobs into a cheerful Easter bunting that adds a pop of color and handmade charm to any room. It’s a fantastic way to use up remnants and create something truly unique.
Supplies for Bunting:
- Various fabric scraps in spring colors and patterns
- Scissors or rotary cutter
- Bias tape or sturdy ribbon
- Sewing machine or fabric glue
- Iron (optional, for crisp edges)
Cut your fabric scraps into uniform triangle shapes (or any shape you prefer!). If sewing, hem the raw edges of each triangle, then fold your bias tape in half and sandwich the top edge of each triangle inside, sewing to secure. If gluing, simply fold the bias tape over the top of each triangle and glue. Space them out evenly. Easy peasy lemon squeezy!
This vibrant bunting is perfect for draping across a window, mantel, or even strung across your garden for an outdoor Easter celebration.
14. Design Playful Felt Bunny Coasters or Placemats

Protect your surfaces with a touch of Easter whimsy by crafting these adorable felt bunny coasters or placemats. They’re super simple, practical, and add a delightful, playful element to your table settings or coffee table.
What You’ll Need:
- Felt sheets (white, grey, brown, pink)
- Bunny template (simple silhouette)
- Scissors
- Fabric glue or hot glue gun
- Optional: small white pom-poms for tails
Trace and cut out bunny shapes from your chosen felt colors. For coasters, make them about 4-5 inches wide; for placemats, scale up! You can cut out smaller pink inner ear pieces and glue them on for extra detail. For an extra dose of cuteness, glue a fluffy white pom-pom onto the back for a tail. They’re almost too cute to put a drink on!
These charming felt bunnies are perfect for adding a festive touch to your Easter brunch table, protecting surfaces, or even as small gifts.
15. Craft a Welcoming “Hello Spring” Door Hanger
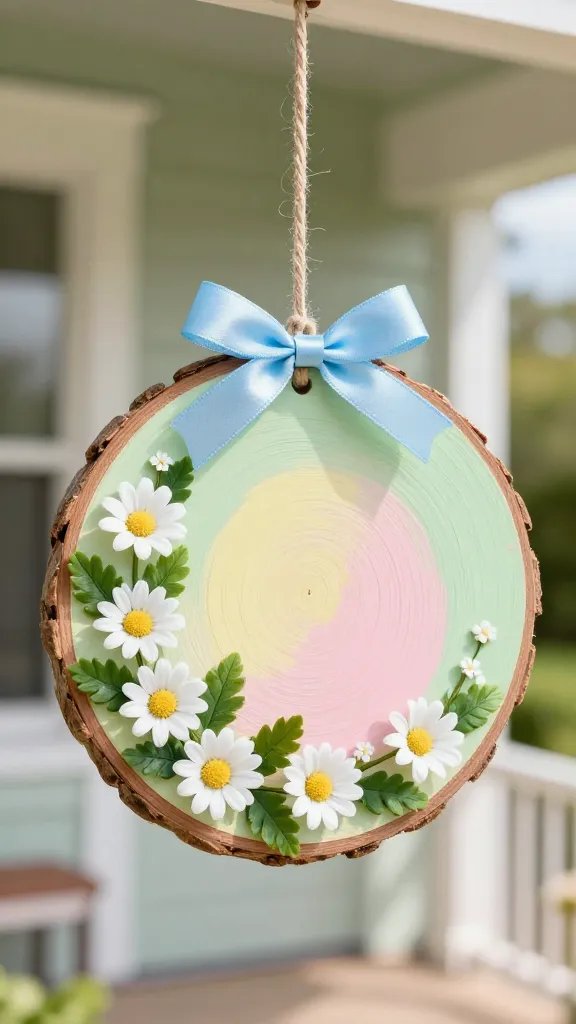
Greet the season and your guests with a charming “Hello Spring” door hanger that’s bursting with festive cheer. This project allows for personal touches and creates an inviting first impression for your home.
Materials Required:
- Wood slice or sturdy cardboard circle
- Acrylic paints (white, green, various spring colors)
- Paintbrushes
- Permanent marker or vinyl letters
- Artificial flowers, greenery, or small bows
- Hot glue gun
- Twine or ribbon (for hanging)
Paint your wood slice or cardboard circle a base color, like white or a light pastel. Once dry, paint “Hello Spring” in the center, or use vinyl letters for a cleaner look. Embellish the top or bottom with artificial flowers, greenery, or a pretty bow, securing them with hot glue. Attach a loop of twine or ribbon to the back for hanging. It’s so welcoming!
This delightful door hanger is the perfect way to welcome guests and celebrate the arrival of spring, adding a personalized touch to your front door.
There you have it – 15 fantastic ways to make your home shine this Easter, all crafted with love and a sprinkle of DIY magic. These projects aren’t just decorations; they’re memories waiting to be made. So grab your supplies, get creative, and prepare for an Easter that’s truly unforgettable!