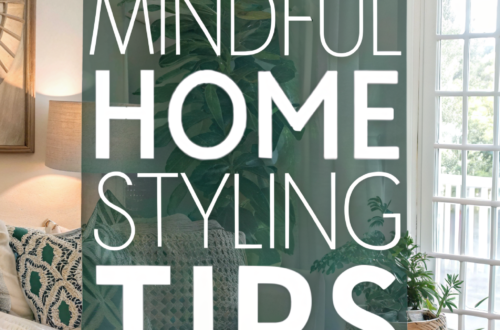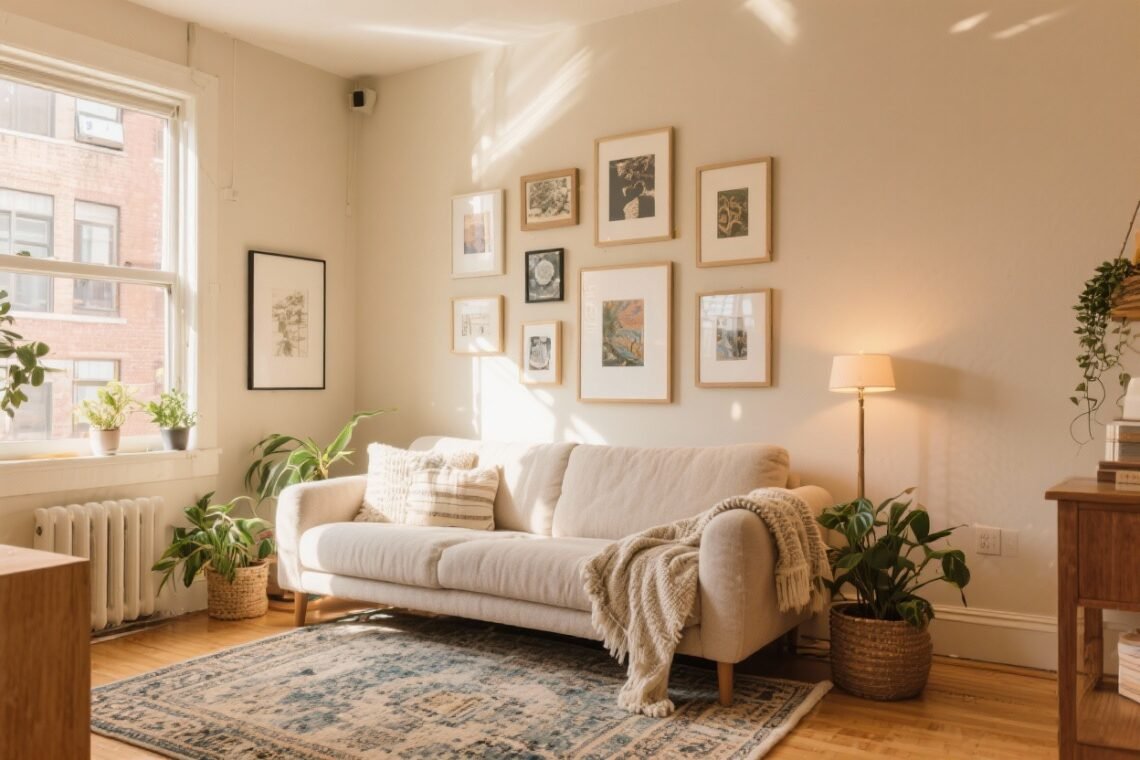
Your blank wall called. It’s bored. If you’ve been dreaming of a gallery wall but your landlord’s deposit is sacred, I’ve got you. These rental-friendly hacks will let you build a cozy, personality-packed display—no Swiss cheese walls, no drama. Grab your frames, your posters, that random vintage postcard, and let’s make magic.
1. Start With A Stick-On Layout (No Nail Panic)
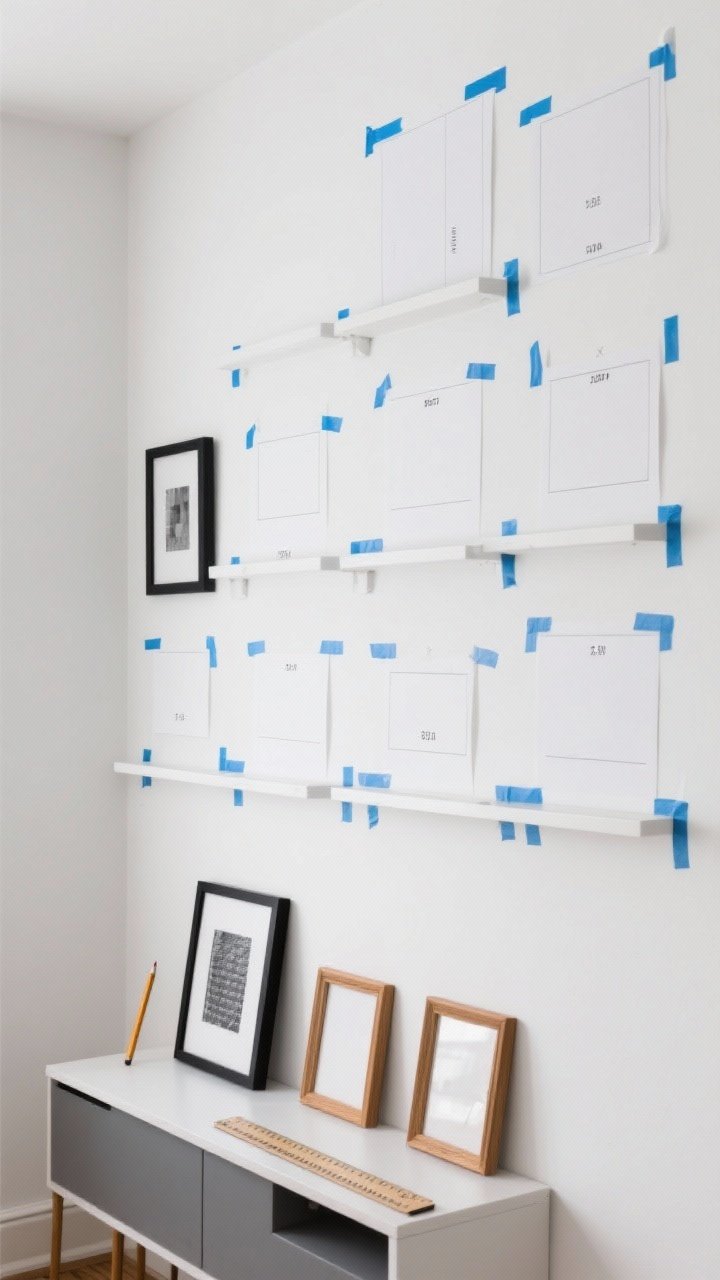
Before you commit, map it out. Use removable paper templates taped with painter’s tape to test scale and spacing. Stand back, squint, rearrange—repeat until it feels right.
- Command strips are your besties. Match strip strength to frame weight and follow the prep directions (clean walls + firm press).
- Try a gallery shelf illusion: line frames at the same bottom height for instant cohesion, even if sizes vary.
- Keep 2–3 inches between pieces for breathing room. Tight enough to feel curated, not chaotic.
2. Mix Frames, But Keep A Vibe
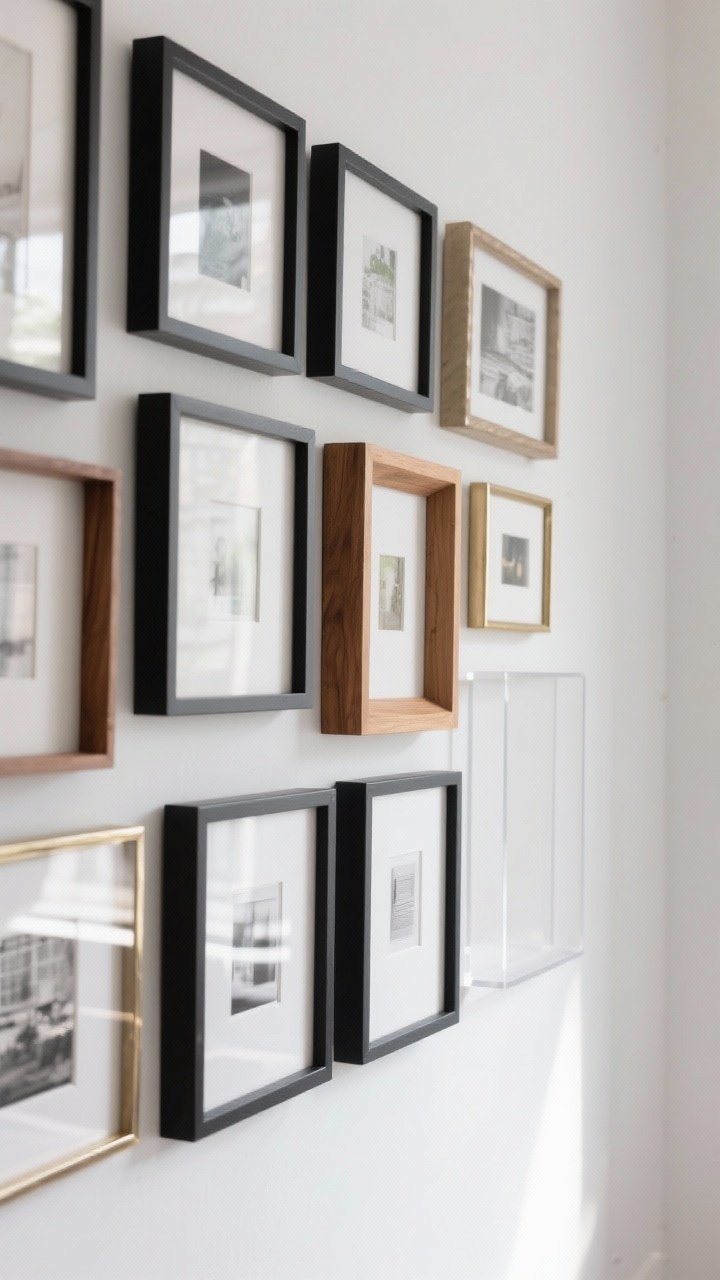
Yes, you can mix woods, metals, and acrylic—just anchor the look with one repeating element. Maybe all black frames, but different profiles. Or all warm woods with one bold metallic piece for contrast.
- Pick 1–2 dominant colors for frames and let a third be the accent (gold, brass, or black usually plays well).
- Use mats to standardize. A mismatched print looks luxe when it has a crisp white mat—instant upgrade, IMO.
- Break up heavy frames with floating acrylic frames for a lighter, airier feel.
3. Go Beyond Art: Add Objects For Texture

Flat walls are fine. Textured gallery walls are better. Mix in a woven basket, a small mirror, a hat, a pressed botanicals frame, or even a mini wall planter.
High-Impact, Low-Commitment Extras
- Peel-and-stick hooks for hats and lightweight objects—cute and reversible.
- Mini mirrors bounce light around small apartments. Choose rounded edges to soften straight lines.
- Shadow boxes for ticket stubs, seashells, or family keepsakes—your story, but make it chic.
Pro tip: Repeat one texture—like rattan—twice across the wall so it feels intentional, not random.
4. The Renters’ Rail: Ledges, Rails, And Clever Loopholes
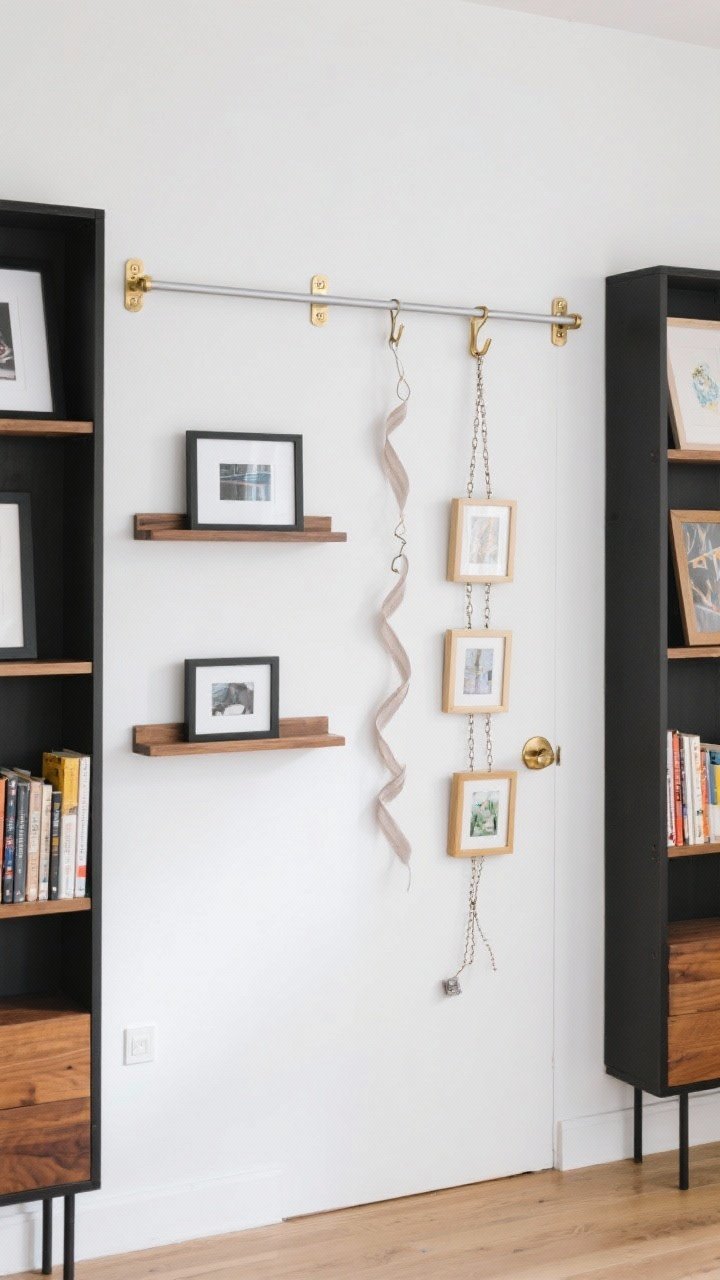
If your lease is stricter than a high school dress code, think gallery ledges and hanging rails. They’re removable, flexible, and ridiculously stylish.
- Command picture ledges hold small frames and objects. Layer frames by height for depth.
- Tension-rod rail trick: In alcoves or between bookcases, use a tension rod and clip art from ribbons or chains. Zero screws, maximum drama.
- Over-the-door hooks with a long ribbon or chain can suspend a vertical row of frames. Unexpected? Yes. Cute? Also yes.
FYI: With ledges, you can switch art seasonally without touching the wall again. Lazy decorator’s dream.
5. Print Smart: High-Low Art That Looks Curated
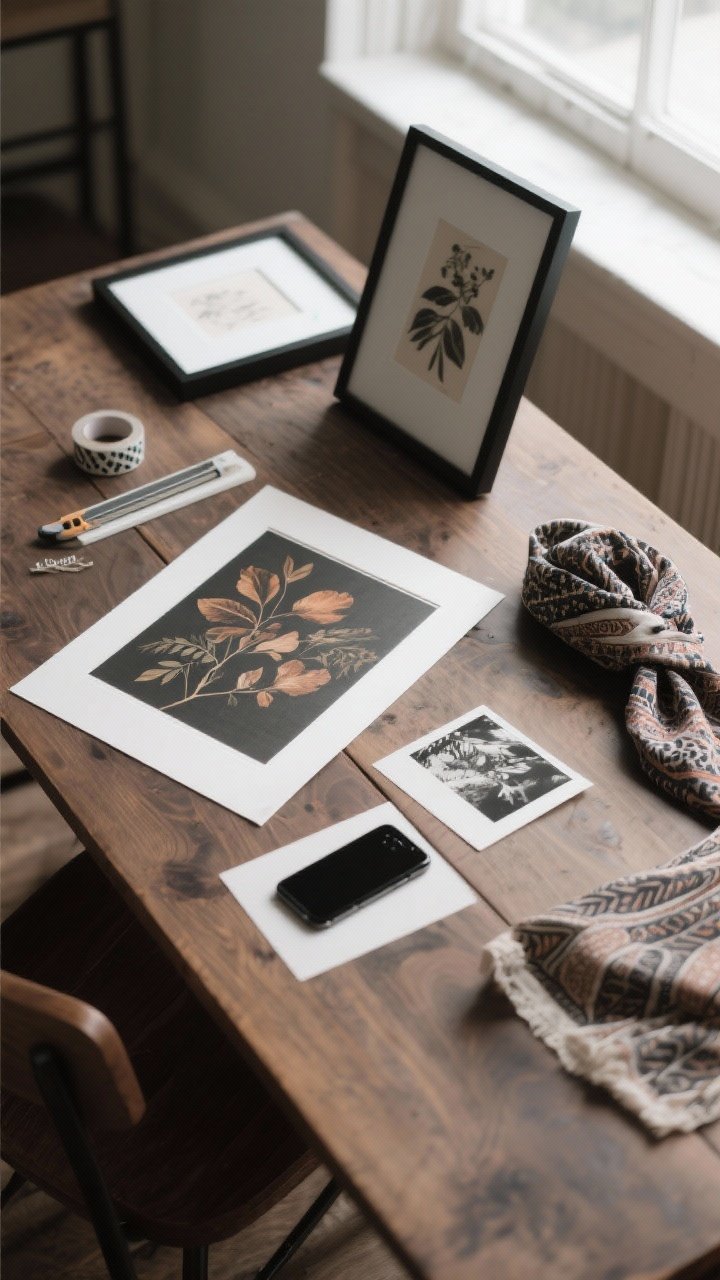
You don’t need museum-grade originals to nail the vibe. Blend free public domain art, personal photos, and indie prints for a wall that looks collected over time.
Where To Source
- Public domain: Libraries and museums (Met, Rijksmuseum) offer high-res downloads. Print on matte paper.
- Phone photos: Black-and-white edits make even casual shots feel intentional.
- Textile scans: Photograph a favorite scarf or fabric for subtle pattern art.
Choose a theme-lite: maybe “moody neutrals,” “botanical warm,” or “travel in black-and-white.” Not matchy, just cohesive.
6. Layouts That Never Fail (Steal One)
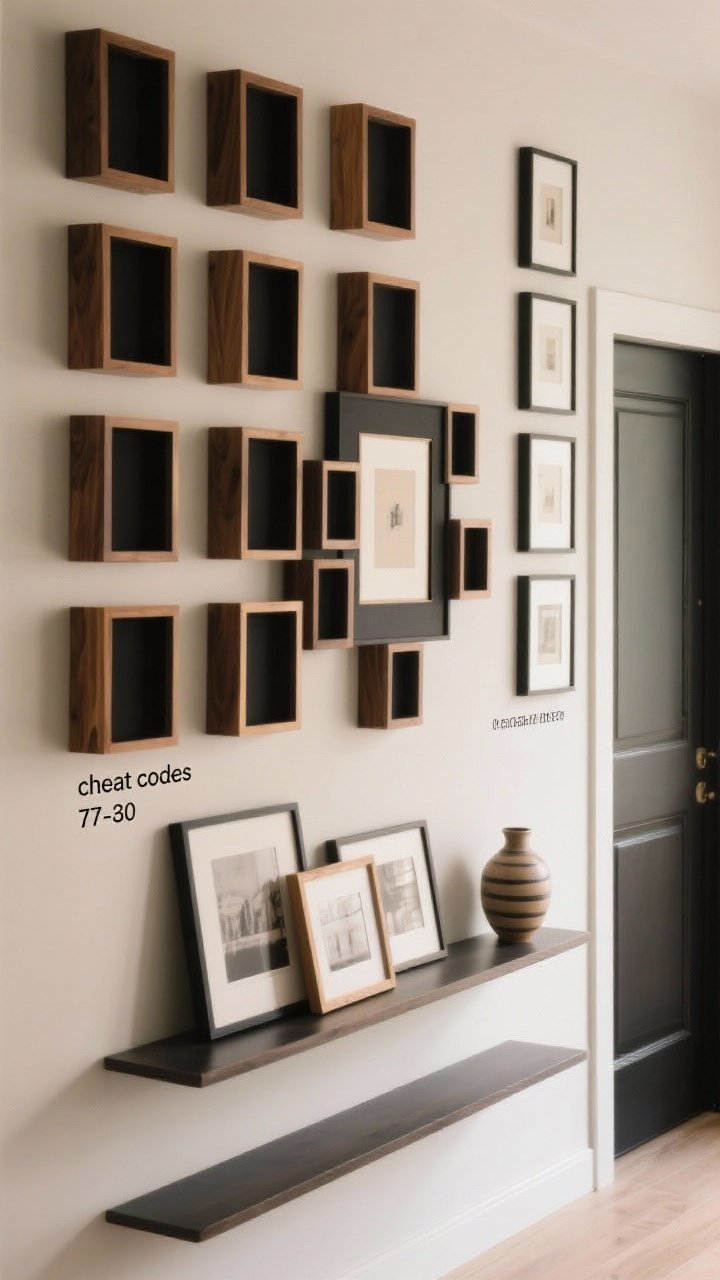
Paralyzed by options? Start with a proven layout and tweak. These four are basically cheat codes.
- The Grid: 6–9 same-size frames in perfect alignment. Clean and calming. Great for hallways.
- The Organic Cluster: Start with your largest piece slightly off-center and build around it with varied sizes. Keep that 2–3 inch spacing.
- The Column: Three to five pieces stacked vertically for tight spaces or beside a door.
- The Shelf Stack: One or two picture ledges with frames overlapping. Add a small object (a vase or candle) to break the frame parade.
Hang at eye level—center around 57–60 inches from the floor. If you’re vertically gifted, resist the urge to go sky-high. Your guests will thank you.
7. Damage-Free Hanging Like A Pro (It’ll Actually Stay Up)
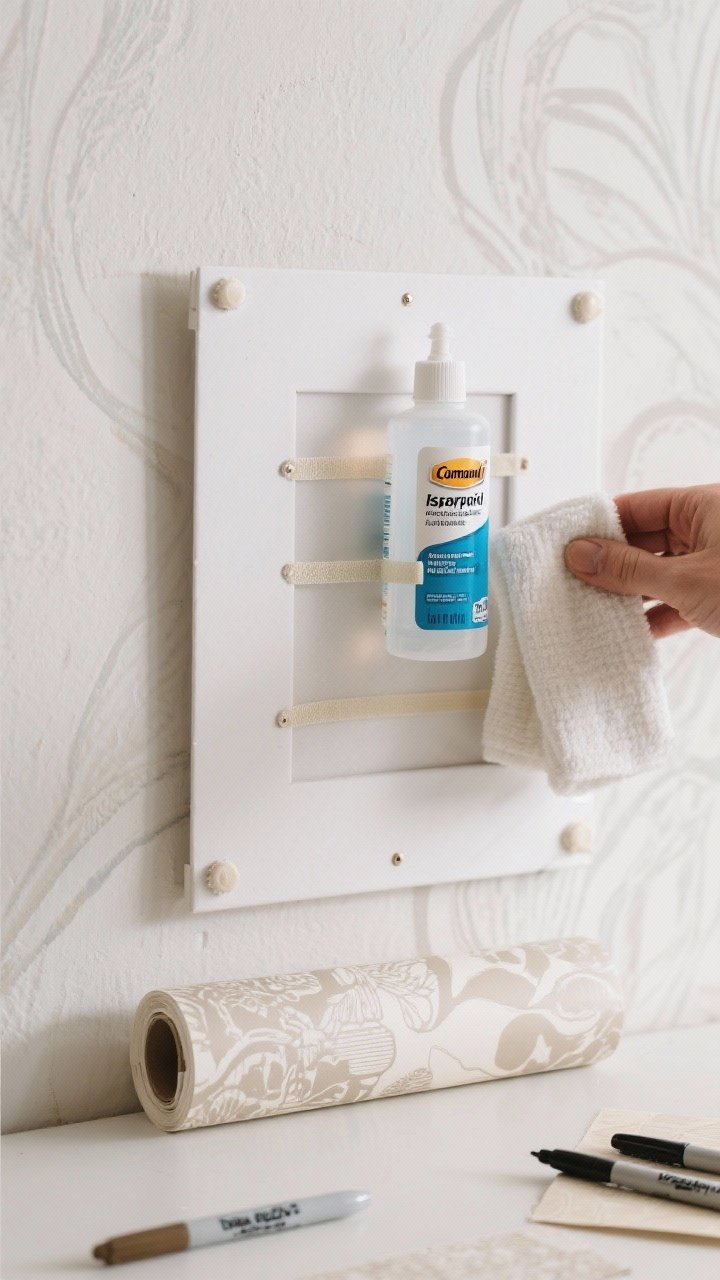
Let’s keep your deposit and your frames intact. The secret? Prep and weight ratings. Don’t wing it.
Prep Matters
- Clean walls with isopropyl alcohol (not cleaner) before applying strips. Let dry fully.
- Match strip capacity to frame weight. If your frame is 4 lbs, use 6–8 lb strips—over, not under.
- Press for 30 seconds, then wait an hour before hanging. Painful, but worth it.
Smart Workarounds
- Velcro strips allow micro-adjustments. Straight frames, zero nail holes.
- Poster putty at the bottom corners stops frames from tilting when doors slam.
- Peel-and-stick wallpaper panels behind your gallery add a “mural” effect. When you remove it, any minor scuffs vanish with it—bonus.
Insurance policy: Keep a pack of touch-up paint pens in a neutral tone for tiny marks on move-out day. You’re welcome.
Ready to do this? Curate, stick, step back, adjust, and then pretend it just came together “by accident.” Your cozy apartment just leveled up—no holes, no stress, all personality. Go claim that wall like the stylish mastermind you are.