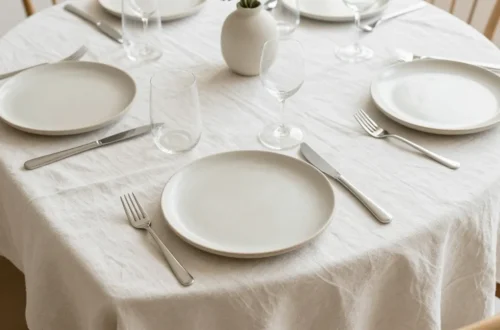
Tired of plastic fantastic and neon nightmares taking over your Easter mantle? Do you cringe at the thought of another year of cartoon bunnies and overly bright eggs dominating your spring decor? You’re not alone. It’s time to ditch the kitsch and embrace elegance with DIY crafts that actually look chic, not childish.
We’re talking about sophisticated touches that elevate your home, making your mantle a true showstopper for the season. Forget the craft store aisles filled with glitter glue and googly eyes. We’re diving into projects that are surprisingly simple but deliver maximum style impact. Ready to transform your space? Let’s get crafting!
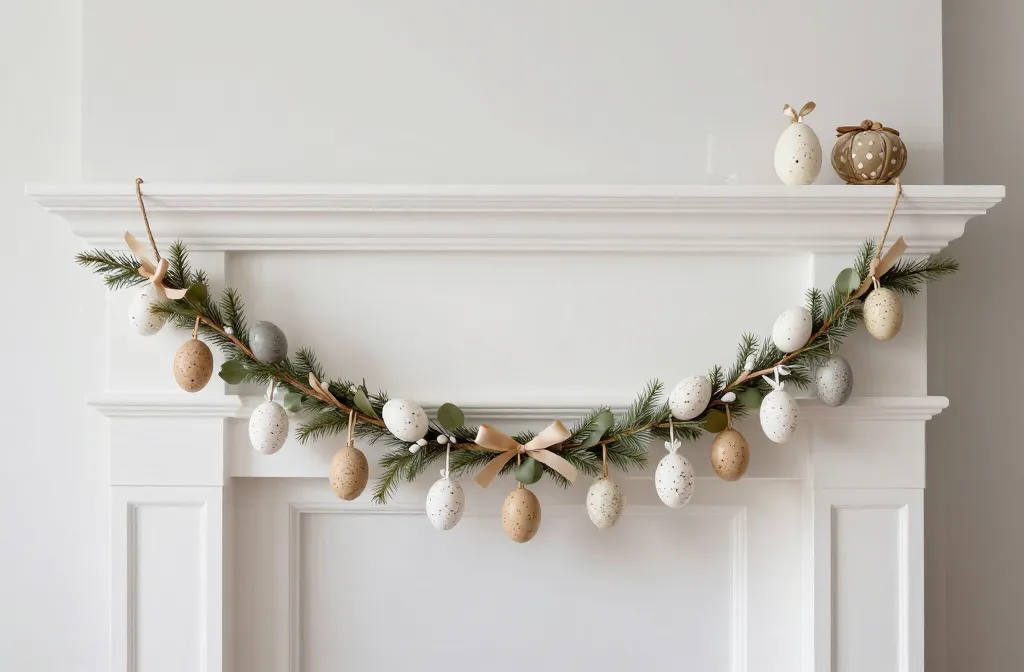
The Sophisticated Speckled Egg Garland
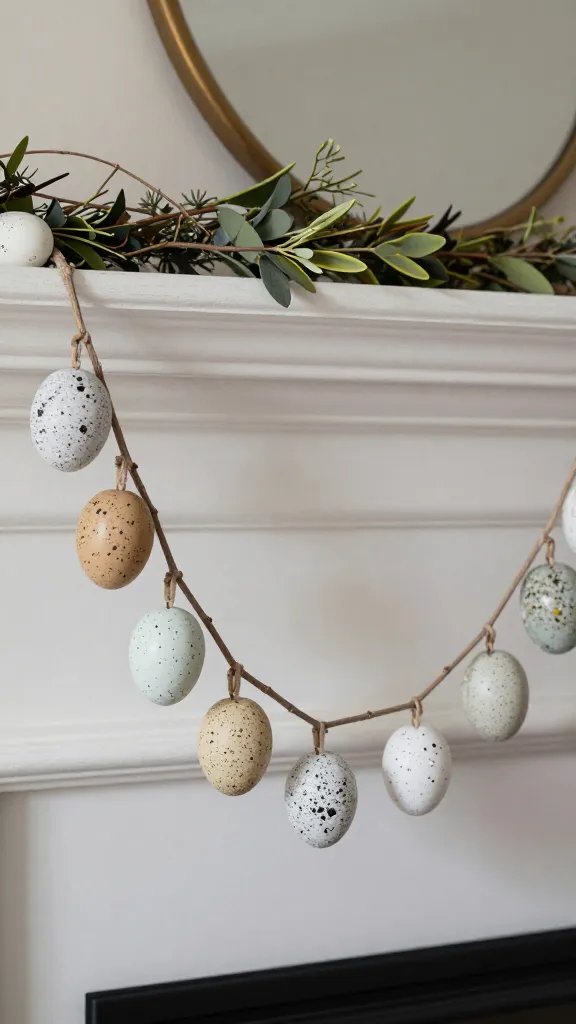
First up, let’s talk about eggs – but not the kind that scream “preschool art project.” We’re creating a delicate, visually interesting garland using faux eggs with a beautiful speckled finish. This project is incredibly versatile and adds an instant touch of refined charm.
You can find plain white or natural-toned craft eggs at most hobby stores. The magic happens with a little paint and a toothbrush. Seriously, a toothbrush! It’s the secret weapon for that perfect, organic speckle.
Crafting Your Speckled Masterpiece
- Gather Your Eggs: Choose a mix of sizes if you like, but keep the color palette consistent. Think matte white, cream, or light grey.
- Prepare Your Paint: Pour a small amount of dark brown or black acrylic paint into a shallow dish. Thin it slightly with water if it’s too thick.
- Get Speckling: Dip an old toothbrush into the paint, then hold it over an egg. Run your thumb across the bristles, flicking tiny paint droplets onto the egg. Practice on a scrap piece of paper first to get the hang of it!
- Dry and String: Let the eggs dry completely. Then, use a needle to thread them onto a piece of twine or thin ribbon, alternating with wooden beads for an extra touch of texture.
Hang this beauty across your mantle, letting it drape gently. It’s understated, elegant, and totally Instagram-worthy.
Ethereal Floral Decoupage Eggs
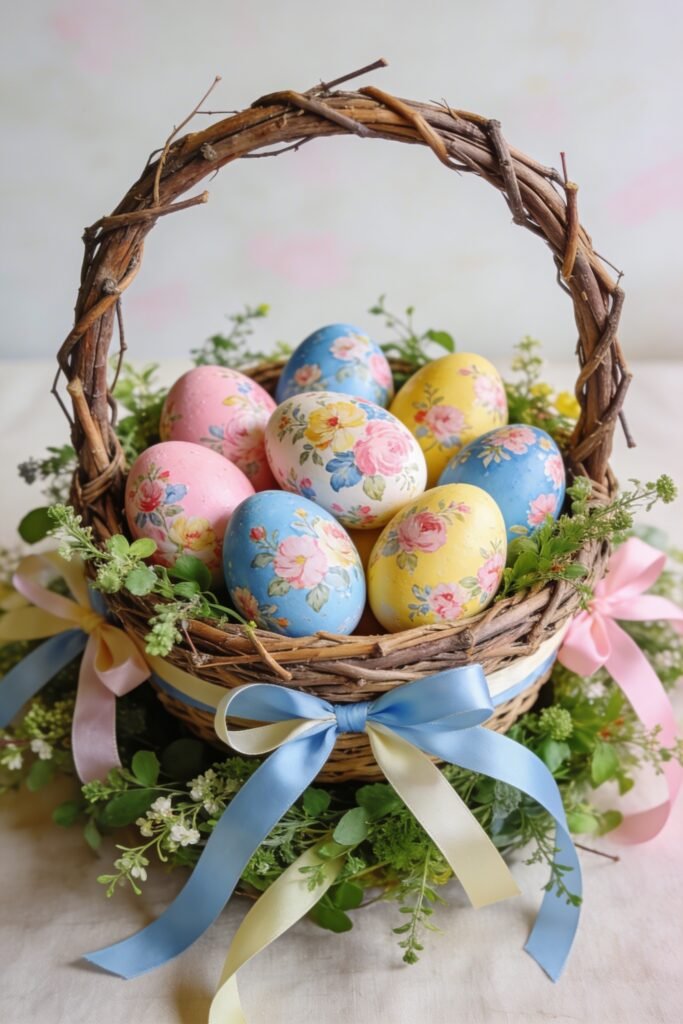
Who knew napkins could be so chic? Decoupage is an old-school craft, but when done with the right materials, it looks incredibly modern and high-end. We’re using delicate floral paper napkins to transform plain eggs into miniature works of art.
This project is surprisingly forgiving. Don’t worry if you’re not a seasoned crafter; if you can cut and paste, you’ve got this. The result is a collection of eggs that look like they belong in a fancy boutique, not your kitchen.
Decoupage Done Right
- Select Your Napkins: Look for paper napkins with small, intricate floral patterns. Think muted tones, botanical prints, or even vintage-inspired designs. Avoid anything too bold or cartoonish.
- Prep Your Eggs: Use plain white craft eggs or even blown-out real eggshells. Paint them white first if they’re not already, to ensure your napkin design pops.
- Cut and Apply: Carefully cut out individual floral motifs from your napkins. Separate the top printed layer from the plain layers underneath. Using a small paintbrush, apply a thin layer of Mod Podge to a section of your egg. Gently place a floral cutout onto the wet Mod Podge, then brush another thin layer of Mod Podge over the top, smoothing out any wrinkles.
- Repeat and Seal: Continue adding motifs until your egg is covered to your liking. Let them dry completely, then apply a final, even coat of Mod Podge over the entire egg to seal and protect it.
Arrange these beauties in a simple glass bowl or nestled in a small ceramic dish on your mantle. They’re a subtle nod to spring without being over-the-top.
Minimalist Gold Leaf Bunny Silhouettes
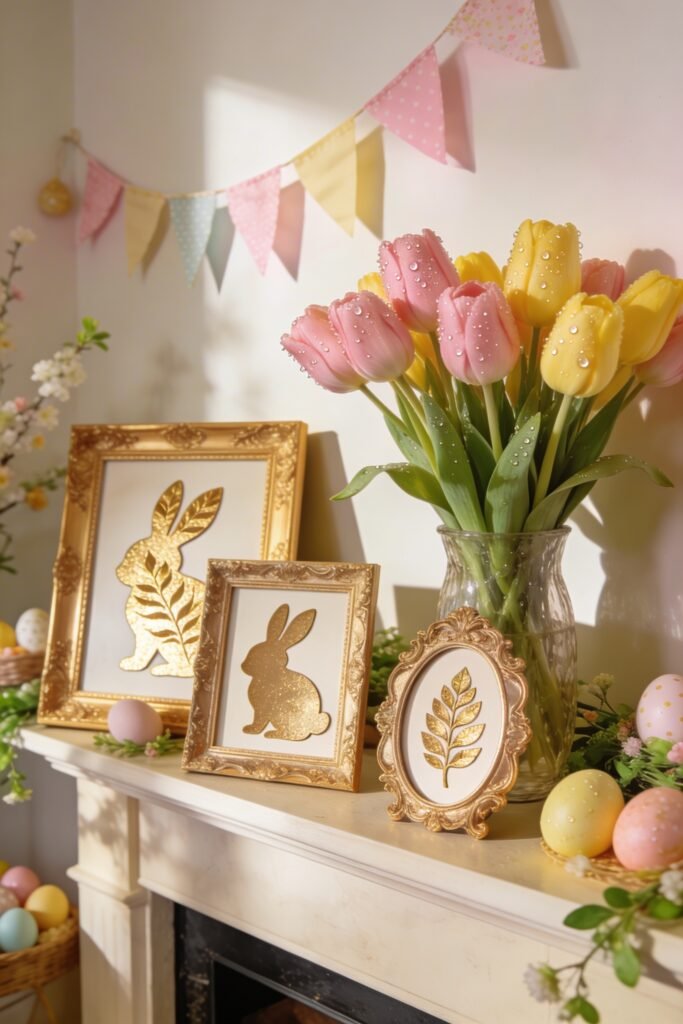
Bunnies, but make them art. We’re ditching the fluffy, cartoonish versions for sleek, sophisticated gold leaf silhouettes. This project adds a touch of metallic glam and modern artistry to your Easter display. It’s simple, striking, and totally elevates your decor.
You don’t need to be an expert in gold leafing, FYI. The beauty of this project lies in its simplicity. A little goes a long way to create a high-impact piece.
Creating Your Gilded Guardians
- Choose Your Bunnies: Find simple bunny silhouette templates online. Print them out on sturdy cardstock or trace them onto watercolor paper.
- Cut Them Out: Carefully cut out your bunny shapes. Precision here makes a difference for a clean, modern look.
- Apply Gold Leaf: Follow the instructions on your gold leaf kit. Typically, you’ll apply an adhesive size to the cardstock, let it get tacky, then gently lay the gold leaf sheets over the adhesive. Rub lightly, then brush away the excess to reveal the shimmering silhouette.
- Frame Them Up: Place your finished gold leaf bunnies in minimalist frames. Think thin black, white, or natural wood frames to keep the focus on the art itself.
Prop these framed bunnies against the wall on your mantle, perhaps flanking a vase of fresh tulips. They’re chic, unexpected, and definitely not your grandma’s Easter decor (no offense, Grandma!).
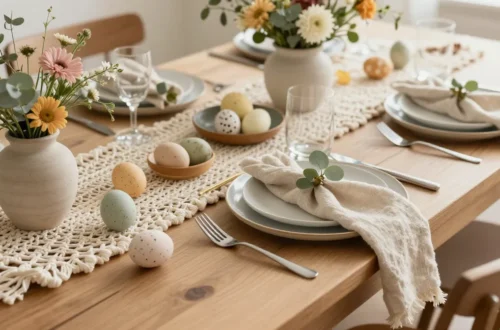
Chic Terracotta Nest Vignettes
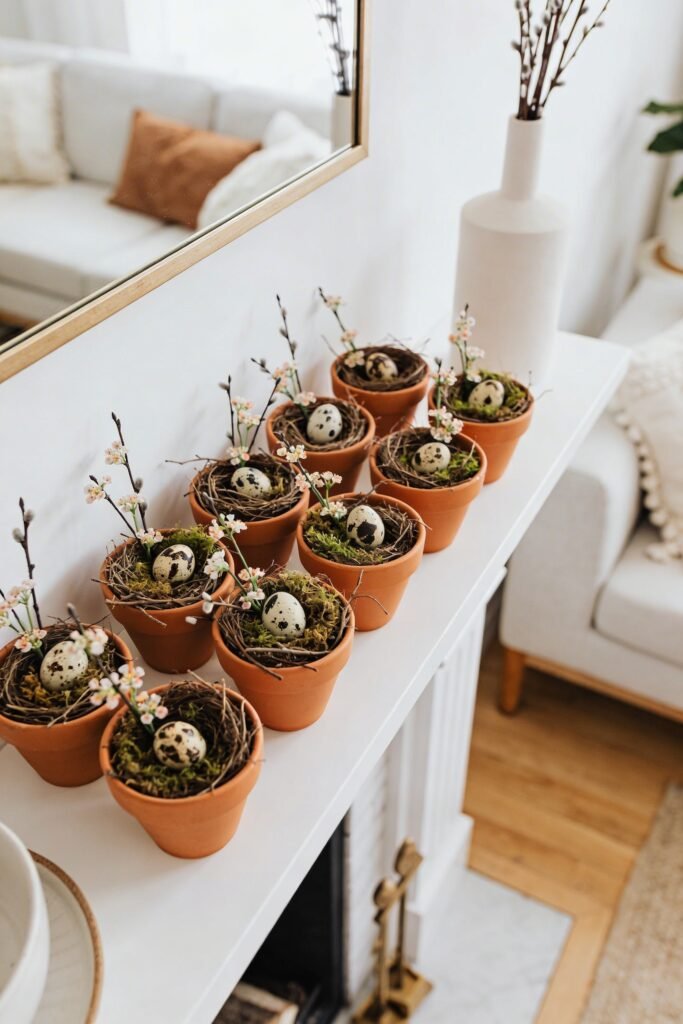
Forget the bright green plastic grass. We’re bringing nature indoors with small, elegant terracotta pot nests. These miniature vignettes are perfect for adding organic texture and a touch of rustic charm to your mantle. They’re earthy, understated, and look incredibly intentional.
The beauty of this craft is its simplicity and the natural elements involved. It feels authentic and handcrafted without looking messy.
Assembling Your Rustic Retreats
- Select Your Pots: Choose small, unglazed terracotta pots. Their natural color and texture are key. You can find these at garden centers or craft stores.
- Gather Nesting Materials: Think dried moss, small twigs, and perhaps a few delicate faux floral sprigs.
- Add Your “Eggs”: Quail eggs (real or faux) are perfect for their delicate size and natural speckles. You could also use small, unpainted craft eggs.
- Assemble: Fill the bottom of your terracotta pot with a bit of moss. Create a small “nest” shape, then gently place a few quail eggs inside. Add a tiny twig or a small sprig of baby’s breath for extra detail.
Arrange a cluster of these pots on one side of your mantle, varying their heights slightly for visual interest. They bring a serene, natural vibe to your space.
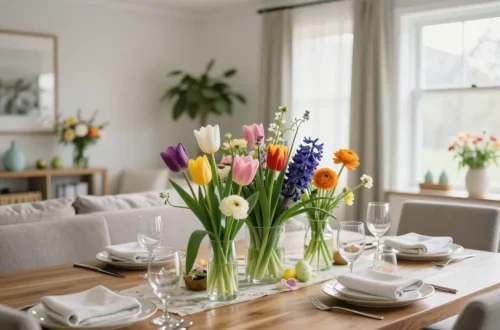
Ombre Painted Vases for Spring Blooms
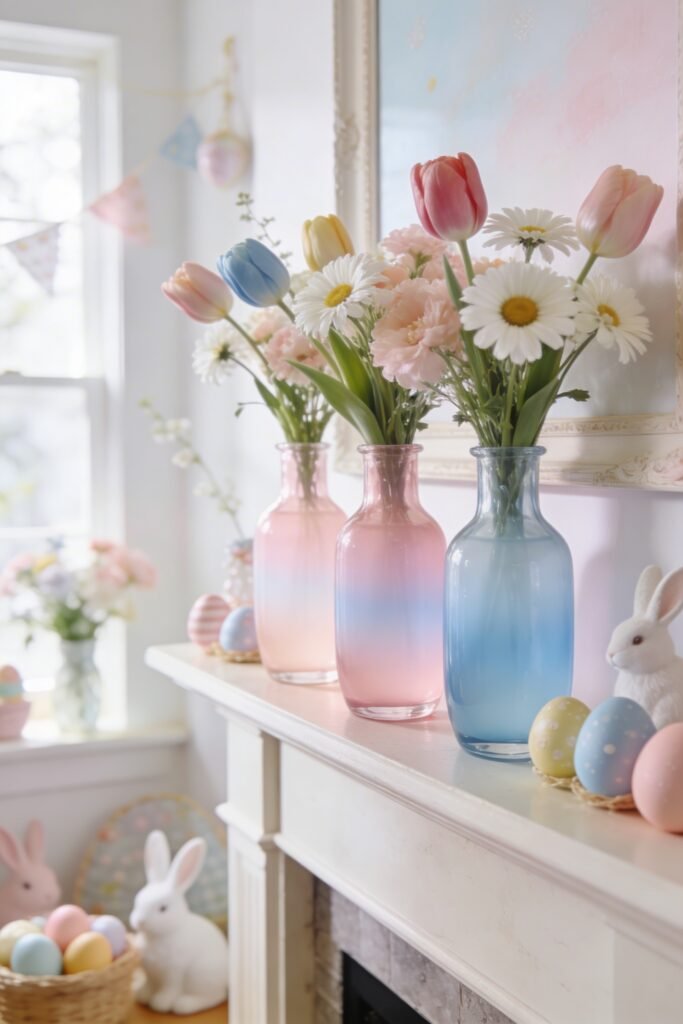
Color, but make it subtle. Ombre is still very much in style, and applying this technique to simple glass vases creates a stunning, custom look perfect for spring. These vases will beautifully hold your fresh-cut flowers, adding a sophisticated pop of color to your mantle.
This project is a fantastic way to upcycle old vases or grab some inexpensive ones from a thrift store. You don’t need special skills, just a steady hand and a bit of patience.
Painting Your Gradient Glamour
- Choose Your Vases: Clear glass vases work best. Vary the shapes and sizes for an eclectic display.
- Select Your Colors: Pick two or three shades of spray paint in a similar color family – think soft greens, dusty blues, muted pinks, or even neutral creams and whites. A matte finish looks incredibly elegant.
- Prep and Paint: Clean your vases thoroughly. In a well-ventilated area, start with your lightest color, spraying the top third of the vase. Immediately (while wet), spray the middle third with your next darkest color, overlapping slightly to create a blend. Finish with your darkest color on the bottom third, again overlapping.
- Blend and Dry: Keep your hand moving to blend the colors smoothly. You might need a second light coat. Let them dry completely, then fill with your favorite spring blooms.
Imagine a trio of these vases, each holding a single peony or a cluster of tulips. Simply divine, IMO.
Yarn-Wrapped Carrots (Yes, Really!)
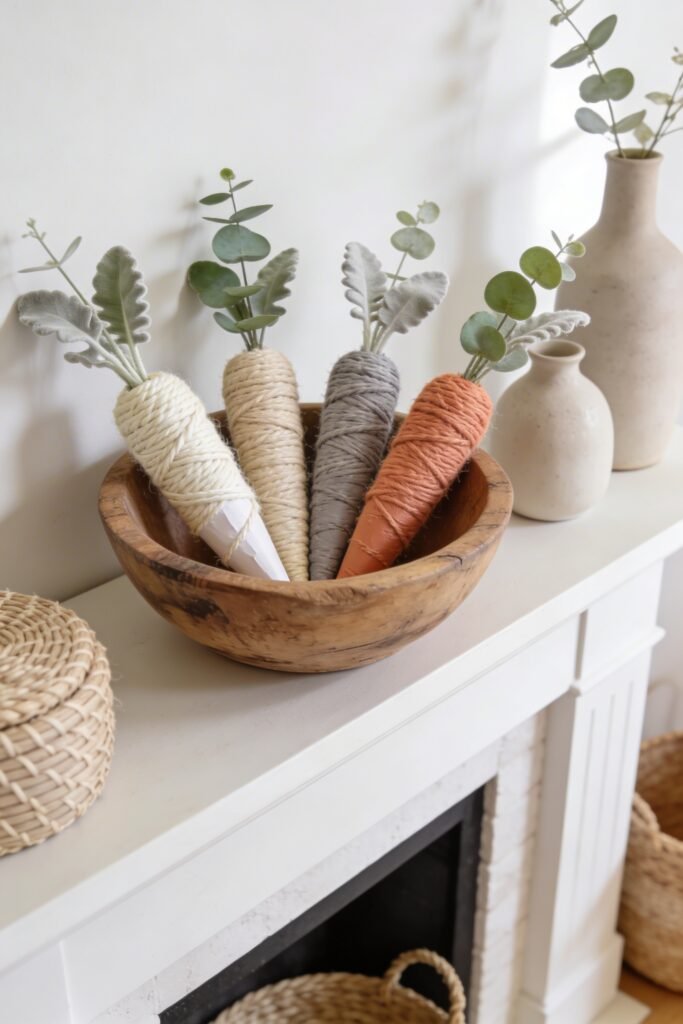
Hold on, hear me out. Yarn-wrapped carrots might sound like something from a kindergarten craft fair, but we’re elevating them to chic mantle decor status. The key? Neutral, high-quality yarn and minimalist faux greenery. Think texture, not cartoon.
This project is surprisingly meditative and results in a tactile, interesting piece that adds a whimsical yet sophisticated touch. It’s a fun way to incorporate the classic Easter motif without sacrificing your aesthetic.
Crafting Your Elegant Root Vegetables
- Form Your Carrots: Start with styrofoam cones (various sizes) or roll newspaper into carrot shapes and secure with tape.
- Choose Your Yarn: This is crucial! Opt for chunky, natural-fiber yarn in cream, beige, light grey, or even a very muted, dusty orange. Avoid anything shiny or brightly colored.
- Wrap Away: Apply a dot of hot glue to the wide end of your “carrot” and secure the yarn. Begin wrapping the yarn tightly around the cone, working your way down. Add small dots of hot glue periodically to secure the yarn, especially at the base and tip.
- Add Greenery: For the “greens,” use small sprigs of faux eucalyptus, lambs ear, or other minimalist greenery. Hot glue them into the top of your yarn carrot.
Arrange these textural carrots in a rustic wooden bowl or standing upright among your other mantle decor. They’re unexpectedly stylish and a great conversation starter.
Botanical Hoop Wreaths
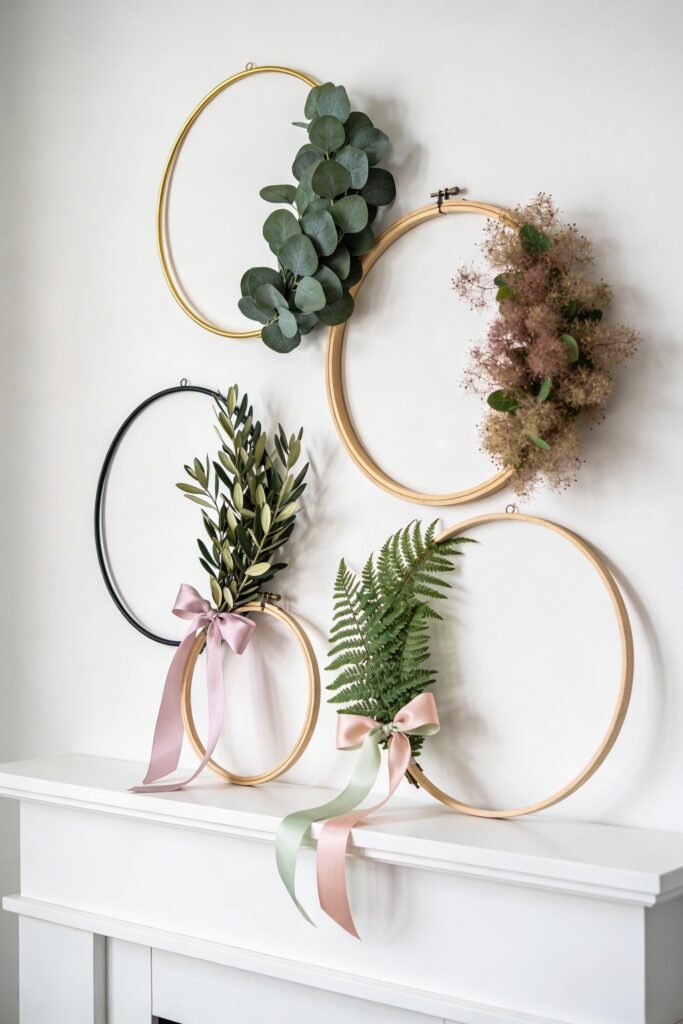
Finally, let’s frame spring itself. Botanical hoop wreaths are minimalist, modern, and bring a refreshing touch of greenery above your mantle. They’re a far cry from overly bushy, traditional wreaths, offering an airy and refined aesthetic.
These are incredibly simple to make and allow you to showcase beautiful faux or dried botanicals in a contemporary way. They add height and dimension without being heavy.
Wreathed in Greenery
- Select Your Hoops: Grab a few metal or wooden embroidery hoops in varying sizes. Gold, black, or natural wood colors work best.
- Choose Your Greenery: Look for realistic-looking faux eucalyptus, olive branches, fern fronds, or even dried lunaria. A mix of textures is great.
- Attach Your Botanicals: Using floral wire or hot glue, attach small clusters of greenery to one section of the hoop. You can cover a quarter, a third, or even just a small sprig at the bottom. The key is to keep it sparse and intentional.
- Hang or Lean: Hang these wreaths on your mantle using clear command hooks, or simply lean them against the wall for a casual, layered look.
These hoops are light, airy, and bring a beautiful organic element to your display. They’re a fresh take on traditional wreaths and perfect for a chic mantle.
Frequently Asked Questions About Chic Easter DIYs
How long do these crafts typically take to complete?
Most of these projects are designed to be relatively quick! The speckled egg garland and terracotta nests can be done in under an hour. Decoupage eggs and gold leaf bunnies might take a bit longer due to drying times or intricate cutting, perhaps 1-2 hours depending on how many you make. The yarn-wrapped carrots are also quite quick once you get into a rhythm.
Can kids help with any of these elegant crafts?
Absolutely! Younger children can definitely help with the speckled eggs (under supervision for the paint flicking!), and they can sort and arrange moss for the terracotta nests. Older kids might enjoy cutting out bunny silhouettes or helping with the simpler yarn wrapping. Just remember, some projects involve hot glue or sharp tools, so adult supervision is key.
What if I’m not “crafty” at all?
Don’t let that stop you! These projects are chosen specifically for their simplicity and the fact that they don’t require advanced crafting skills. The key is selecting quality materials and following the steps. Start with one that appeals most to you, like the speckled eggs or the terracotta nests. You might surprise yourself with how capable you are!
How do I store these delicate crafts for next year?
Careful storage is essential to keep your creations looking pristine. For eggs, wrap them individually in tissue paper and store them in a sturdy box with dividers. Garlands can be gently coiled and placed in a box. Wreaths should be stored flat or hung in a garment bag to prevent crushing. Keep everything in a cool, dry place.
Where can I find chic craft supplies without breaking the bank?
Look beyond the big-box craft stores! Thrift stores are fantastic for unique vases and frames. For faux botanicals and specific craft supplies, check online retailers, local independent craft shops, or even the floral section of grocery stores for inspiration. Don’t underestimate dollar stores for basic items like craft eggs or small pots that you can then elevate with paint.
Can I adapt these crafts for other holidays or seasons?
Definitely! Many of these ideas are incredibly versatile. The ombre vases are perfect year-round. The gold leaf silhouettes could become leaves for fall or stars for winter. The botanical hoops can easily change with the seasons by swapping out the greenery or adding different small elements. Think of these as foundational techniques you can customize endlessly.
A Mantle Transformed, A Spirit Lifted
There you have it – seven elegant Easter DIY crafts that promise to transform your mantle from mundane to magnificent. No more cringing at overly bright, childish decor. You’ve now got the tools and inspiration to create a display that feels sophisticated, personal, and utterly chic.
Crafting these pieces isn’t just about the end result; it’s about the joy of making, the satisfaction of creating something beautiful with your own hands. So grab your supplies, put on some tunes, and get ready to impress yourself (and everyone else!) with a truly stunning Easter mantle. Happy crafting!